Onboarding in Zoho People
What is onboarding?
Onboarding is a process of orienting new employees with the culture and practices of the organization. It became management jargon in the 1970s and is also referred to as orientation or induction in many countries.
Why is it useful?
A good onboarding process leads to better employee job performance and organizational commitment. Using pre-designed flows for both candidate and employee, you can facilitate the entire onboarding process smoothly, in Zoho People.
The onboarding module in Zoho People features two types of onboarding: candidate and employee. These user-friendly modules come with pre-designed tabs that can be customized as well. The onboarding module will considerably reduce the work of the HR department.
Onboarding flows
Under Onboarding Flows, both Employee onboarding and Candidate onboarding processes can be customized according to the needs of your organization.
Candidate onboarding flow
A Candidate Onboarding Flow can be created to apply the onboarding process to candidates. It covers the basic details that need to be filled in by the candidate. The name of the flow can be edited by clicking the edit(pencil)icon.
To view and edit the default tabs in the onboarding module, click Customize.
These tabs can be enabled, disabled, and reordered according to their applicability. The description for each page can also be edited according to the organization’s style.
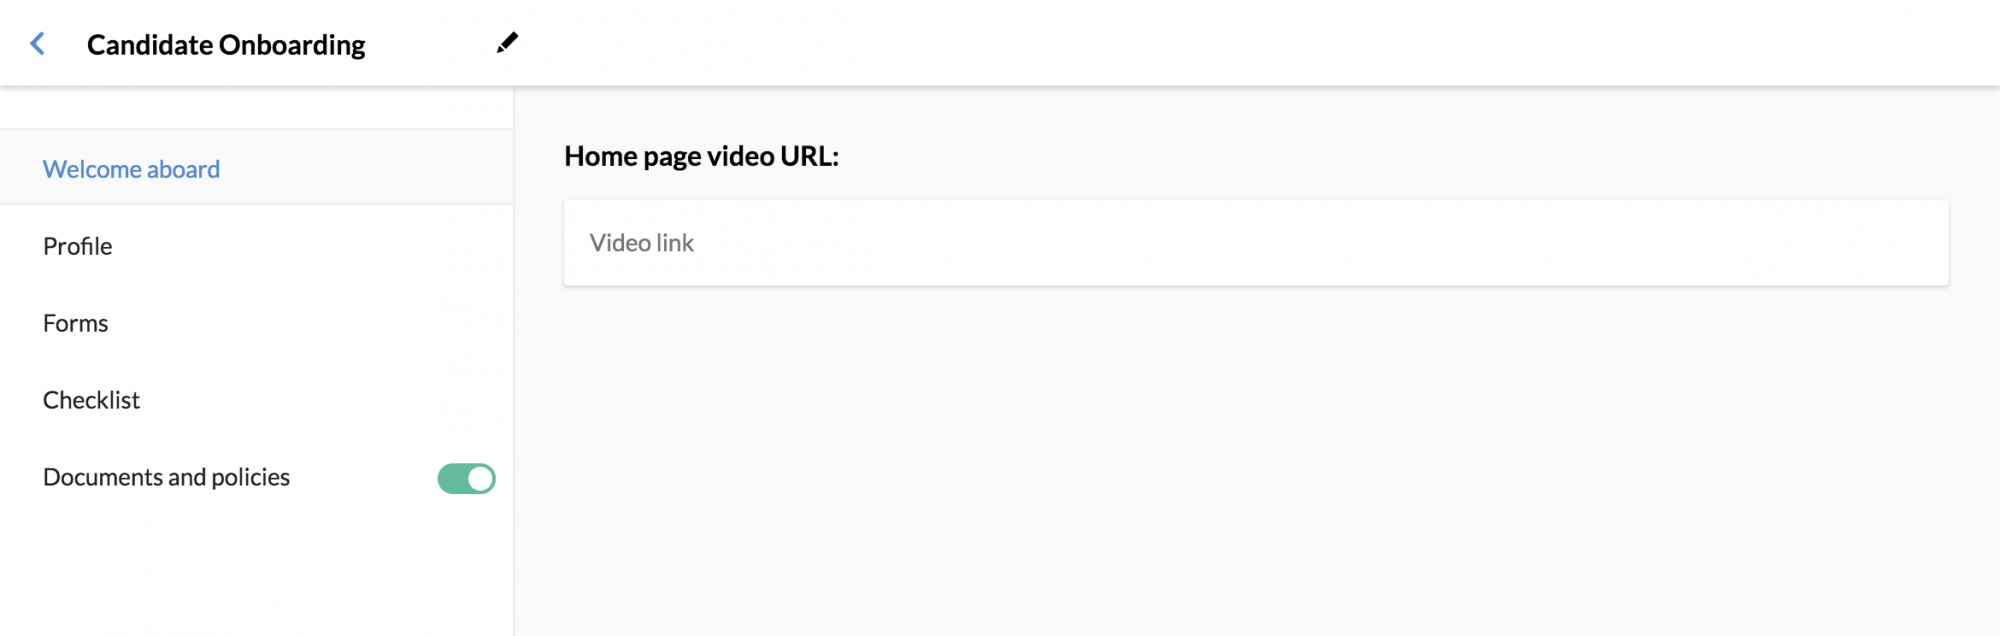
Welcome aboard: This is the first page that will be visible to the candidate. You can add an introductory video of the company under the Home page video URL. This can be embedded and made viewable to the candidate.
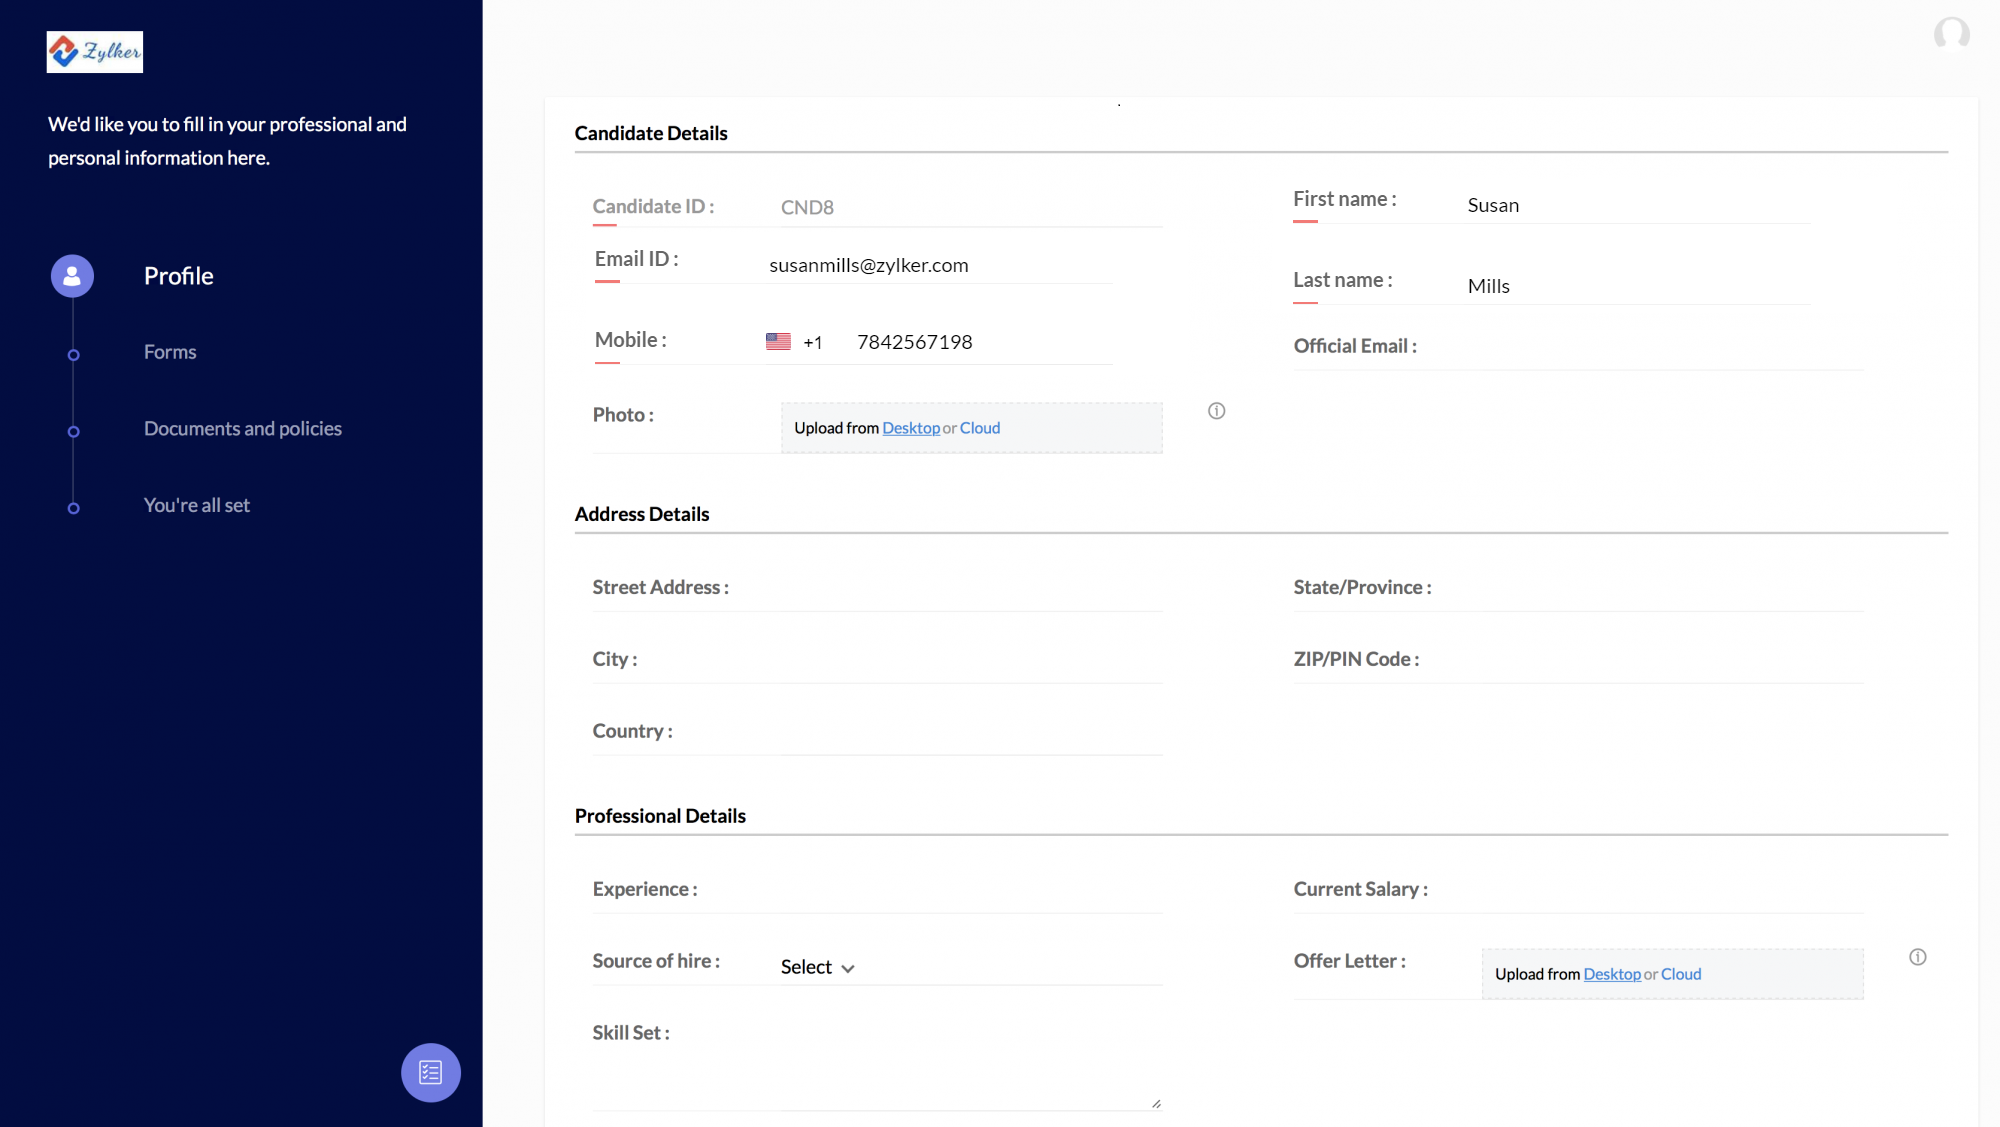
Profile: This is the space where the candidates will need to fill in their personal and professional details.
Forms: Any additional information needed from the candidate can be given here. Any relevant forms can also be included. You can drag and reorder forms also mark the important forms as mandatory to ensure it is not skipped.
Checklist: Checklists to complete a series of tasks after the candidate has completed onboarding can be created here. Existing checklists can also be tagged here.
Documents and Policies: This is where you will share the documents that the candidate will need to read and sign.
Under Documents to be Accepted, you will need to upload the documents using the Mail Merge Template. Documents can be signed using the e-sign option as well.
Under Documents to be Read, you can choose files and company policies that you would like the candidate to read up on.
Employee onboarding flows
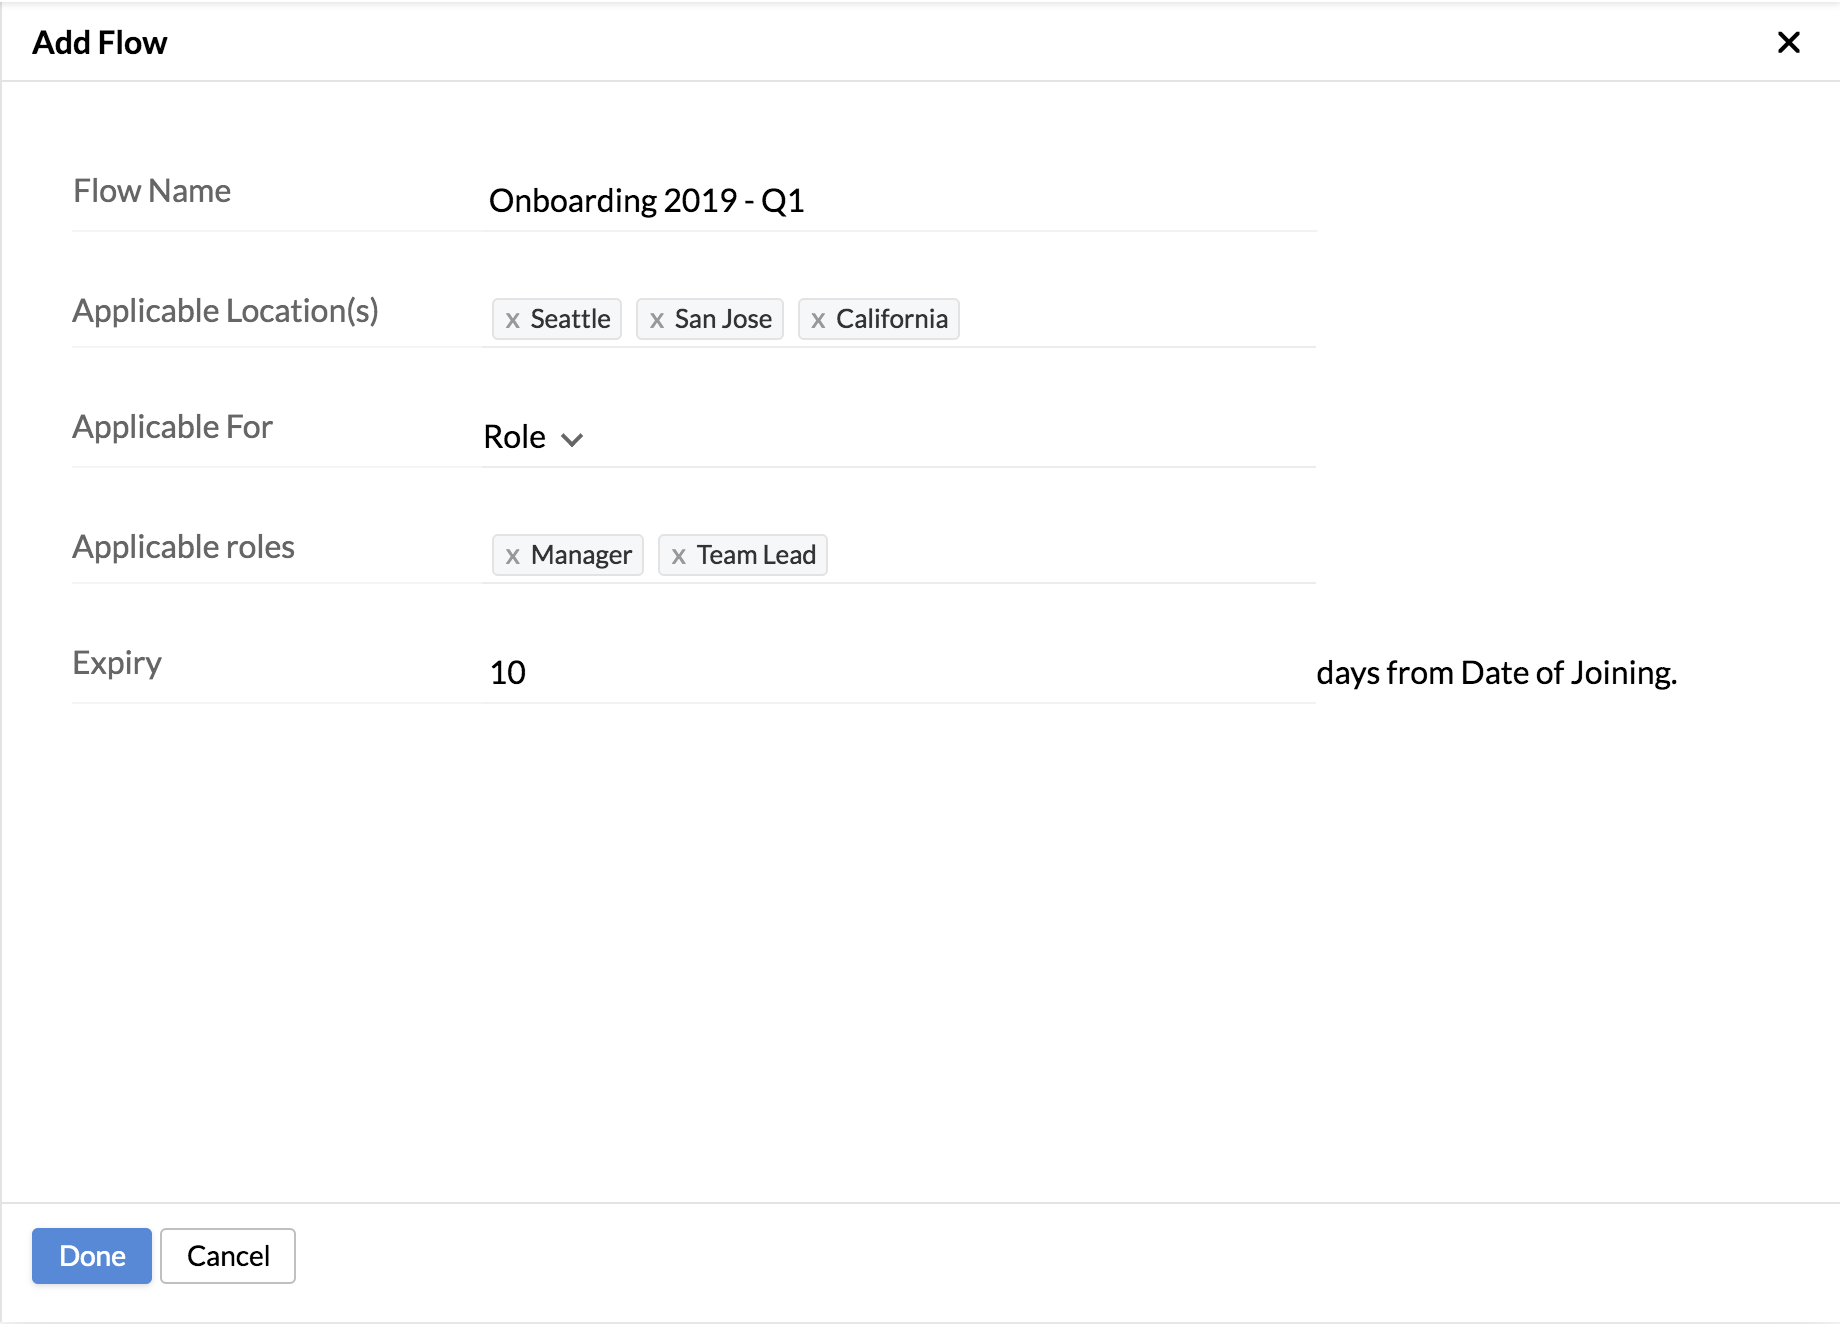
Employee Onboarding Flows can be created to apply the onboarding process to a specific set of employees. It covers the basic details that need to be filled in by the employees and also gives them information about the organization, their team, and their role.
To view the default tabs in the onboarding module, click Customize.
These tabs can be enabled or disabled according to their applicability. The description given for each page can also be edited according to the organization’s style.
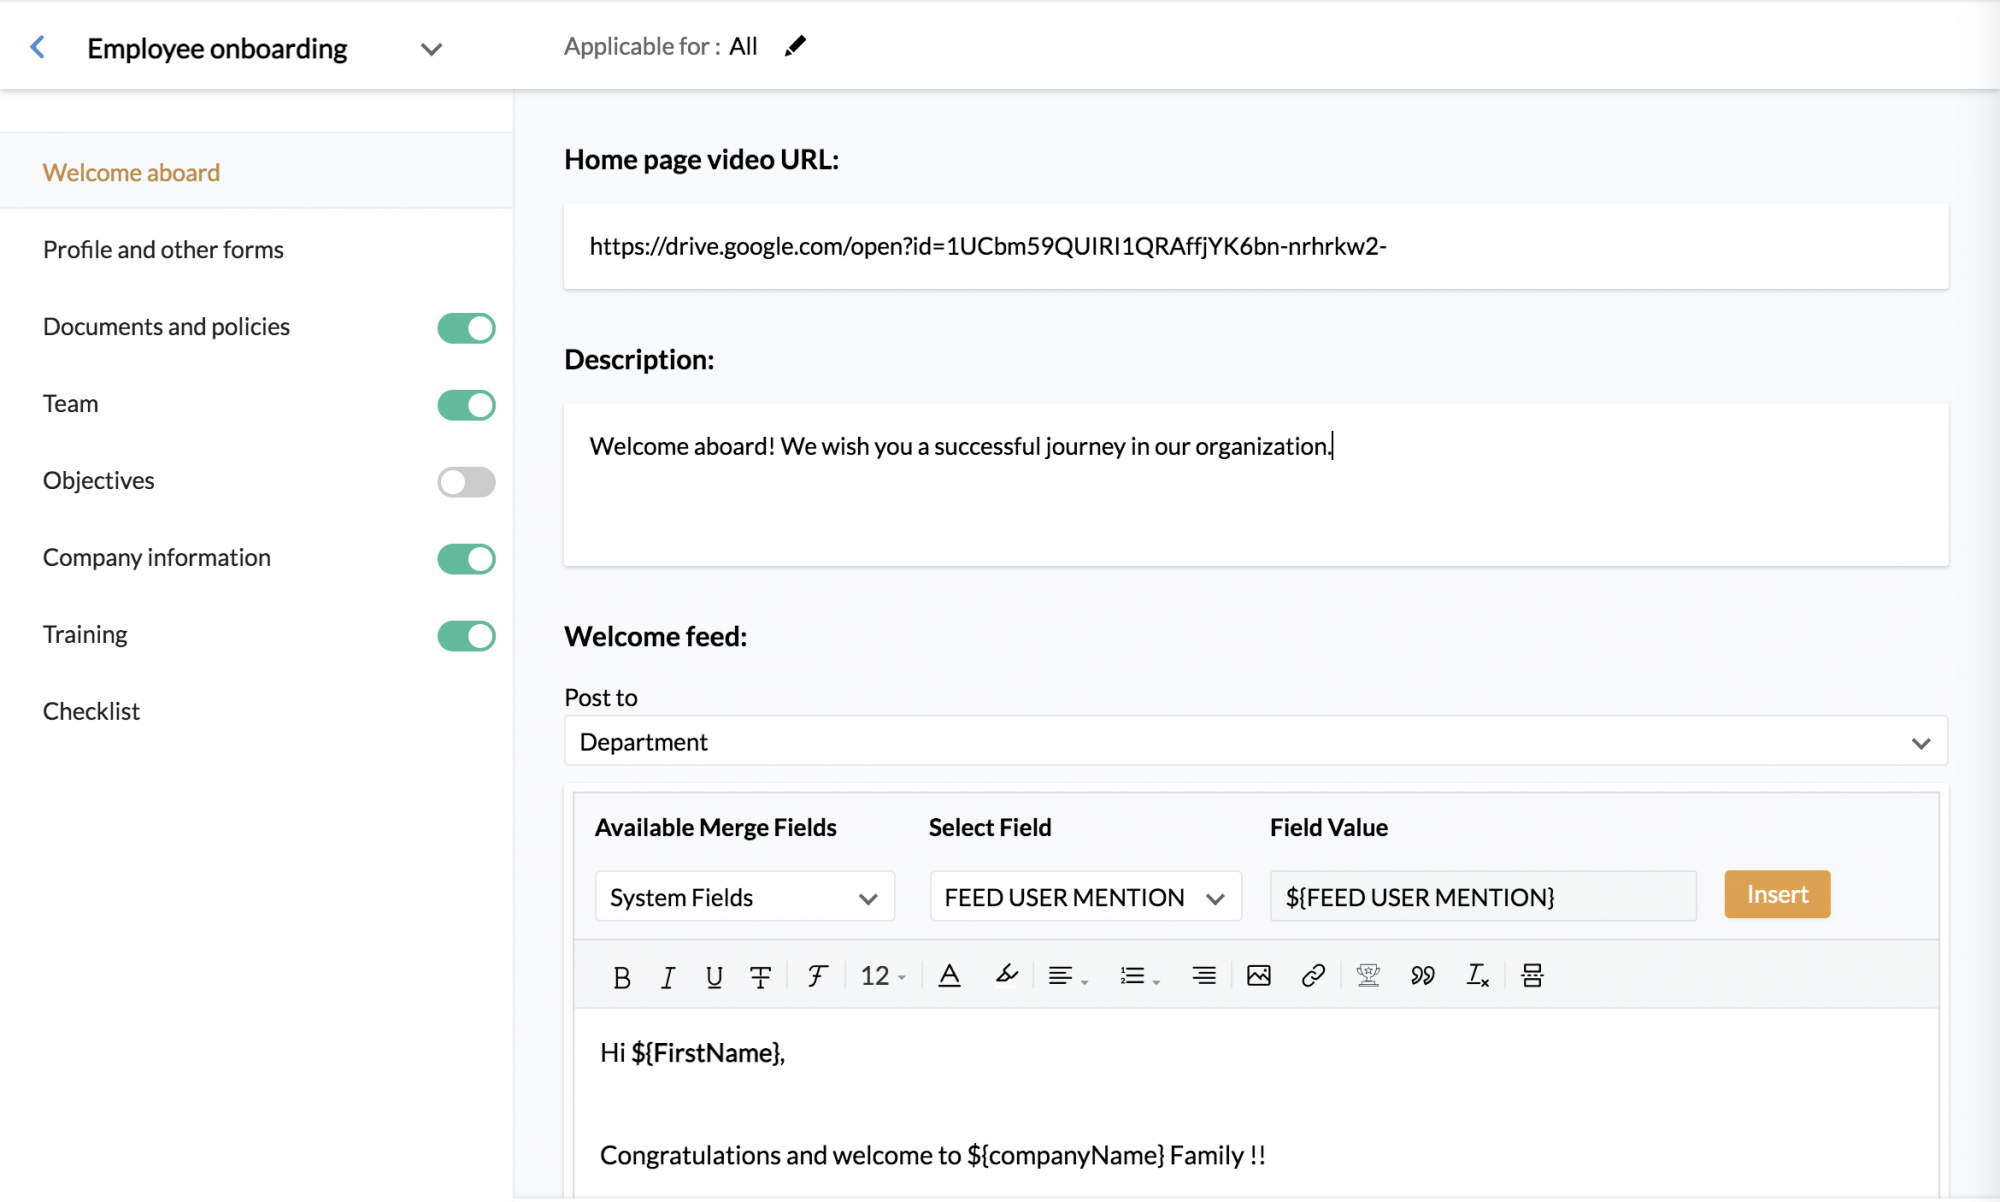
Welcome aboard: This is the first page that will be visible to the employee. It contains an introductory video of the company that can be embedded and made viewable to the employee.
The Welcome Feed will be posted to the new joinee (user) or all department members based on the option selected in the Post To dropdown.
Select the HR Contact whom the employees can get in touch with for any queries.
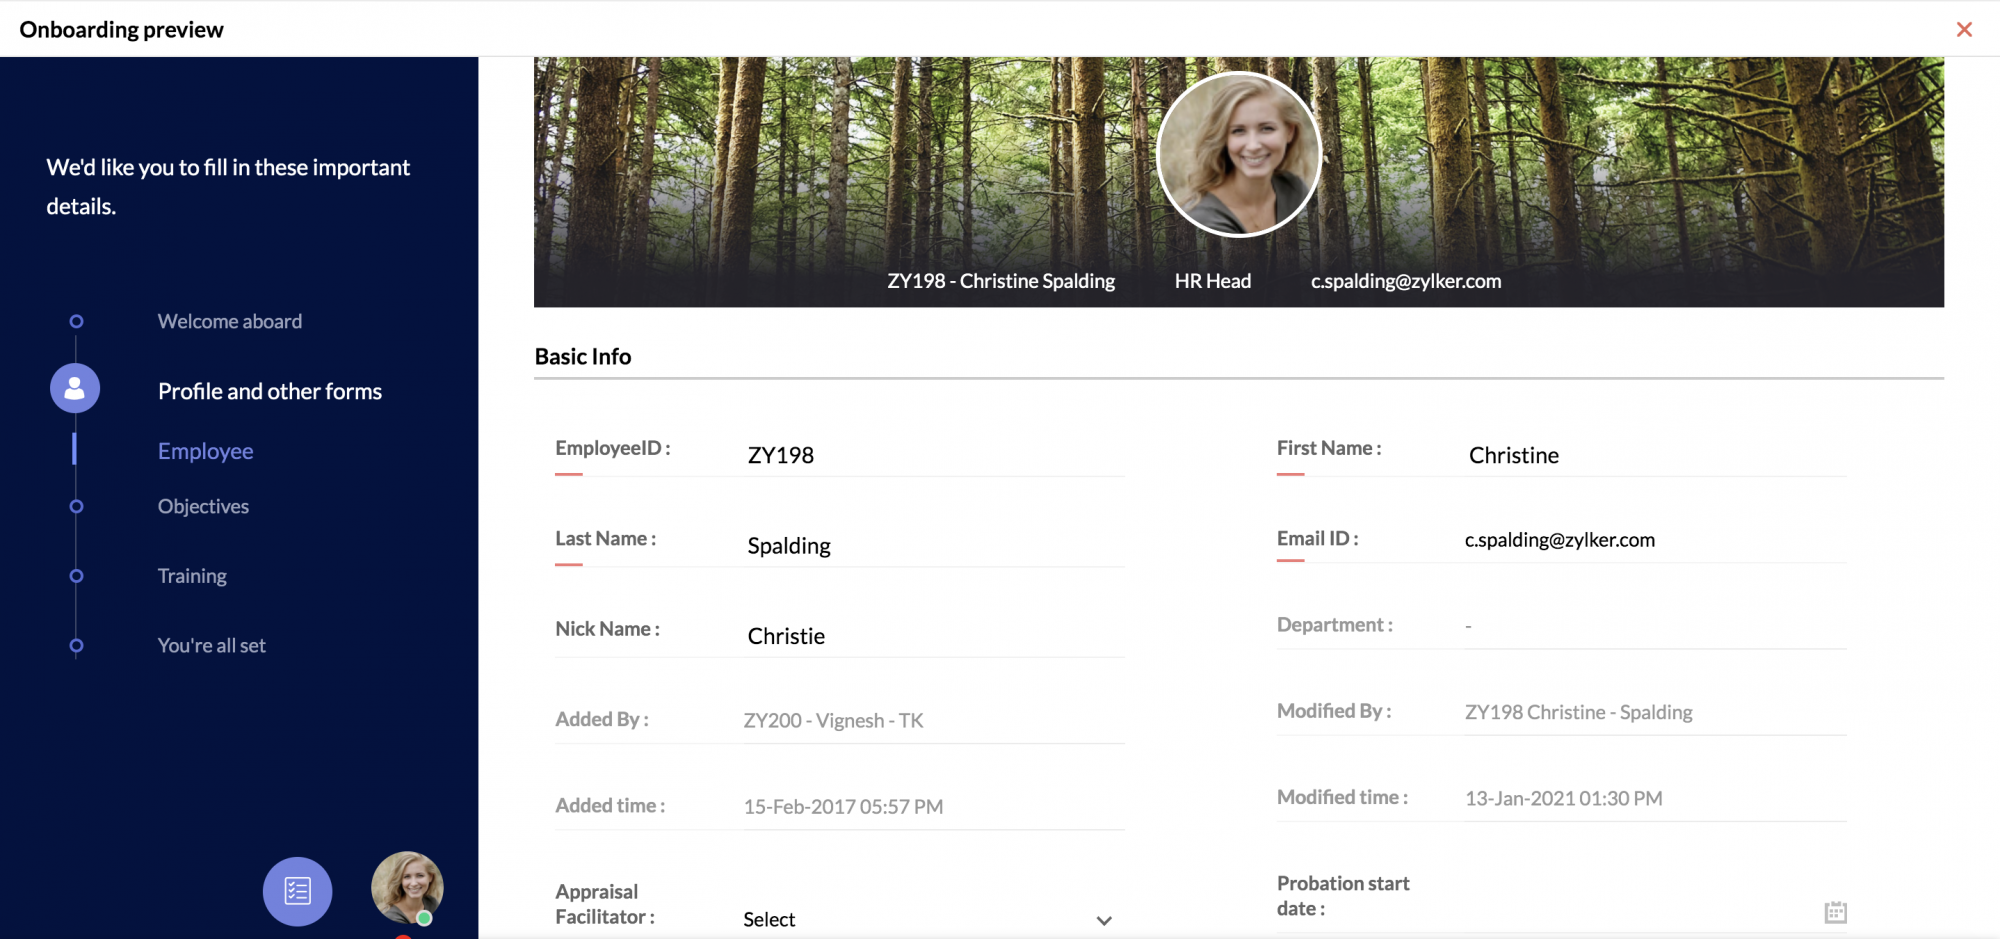
Profile and other forms: This is the space where the employee will fill in all their personal and professional details.
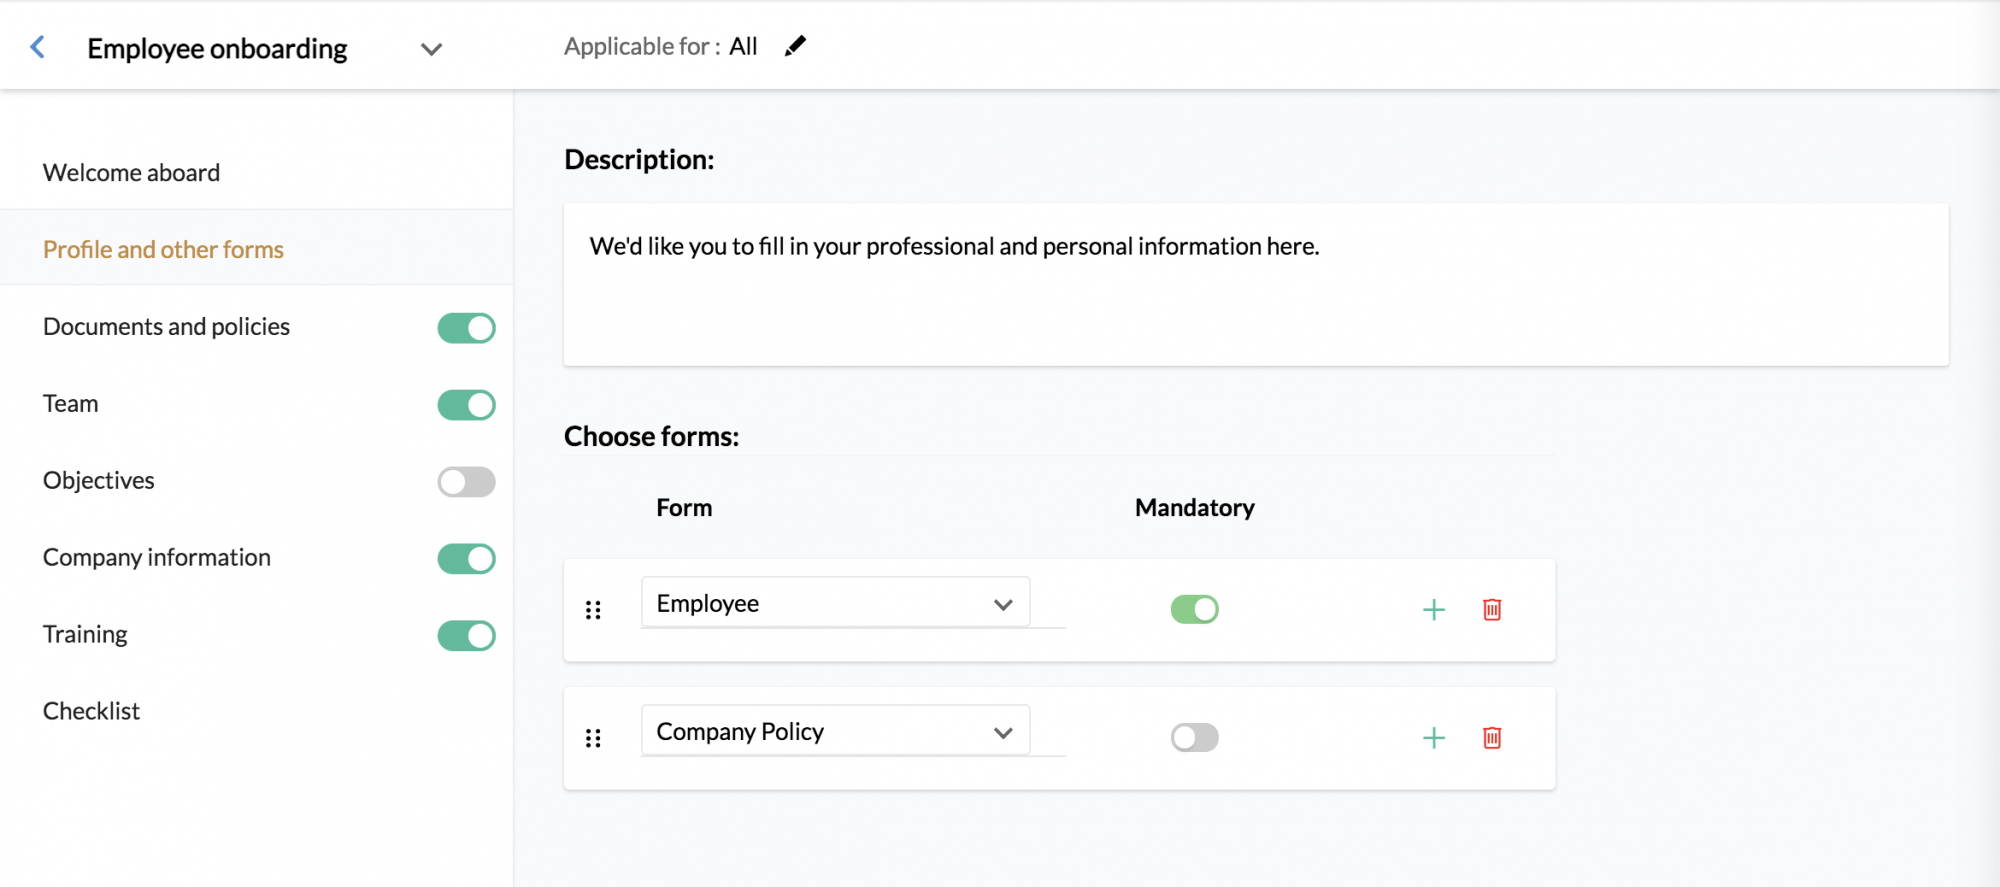
Under Choose Forms, embed the relevant forms that you would like your employee to fill out. You can drag and reorder the forms also mark forms as mandatory if you don’t want the employee to skip it.
Documents and Policies: This is where you will share the documents that the employee will need to read and sign.
Under Documents to be Accepted, you will need to upload the documents using the Mail Merge Template. Documents can be signed using the e-sign option as well.
Under Documents to be Read, you can choose the various company policies that you would like the new employee to read up on.
Team: All the details about the team members of the employee will be shared here. The employee can also access their basic information and seating location.
Objectives: In this page, the employee will be informed about their goals and objectives. Key Result Areas (KRAs) can be tagged to the employee’s location, designation, department, or both.
Company Information: In this page, the employee gets to view more information about the organization by giving access to the company website in the form of an embedded URL.
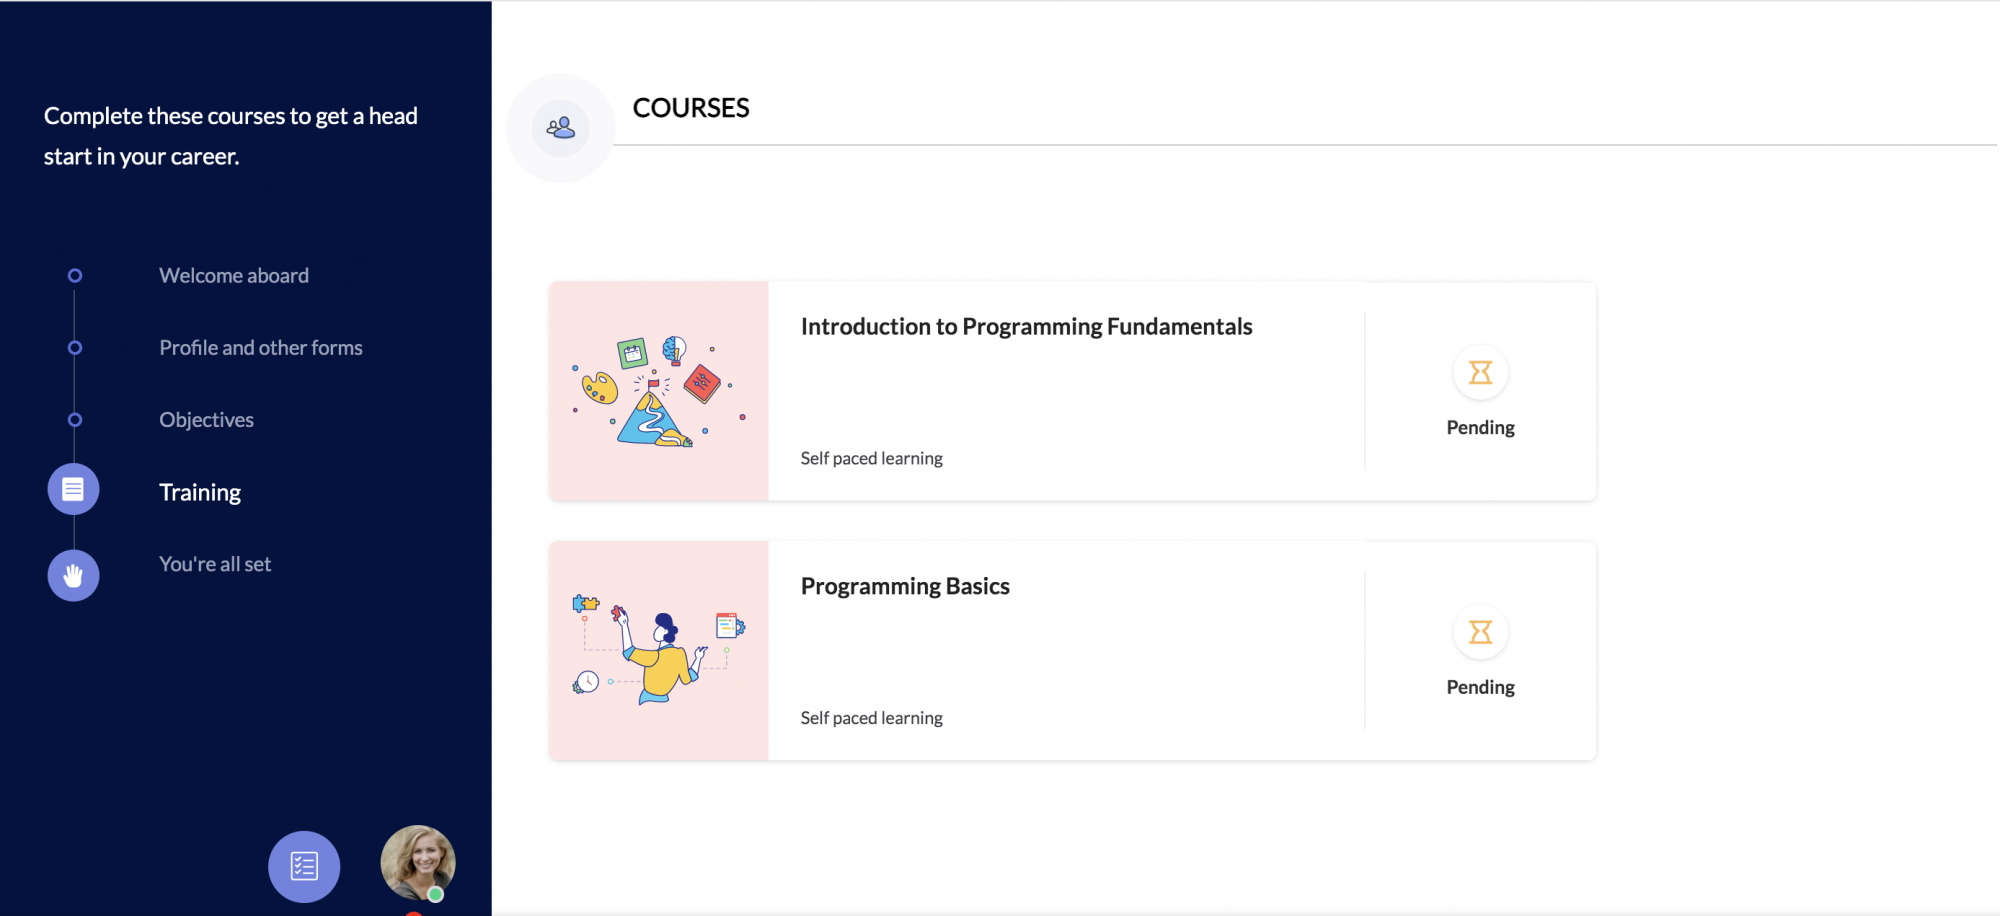
Training: In this tab, you can add self-paced courses that you want your employees to complete as part of their onboarding. You can check the ones you want to make mandatory.
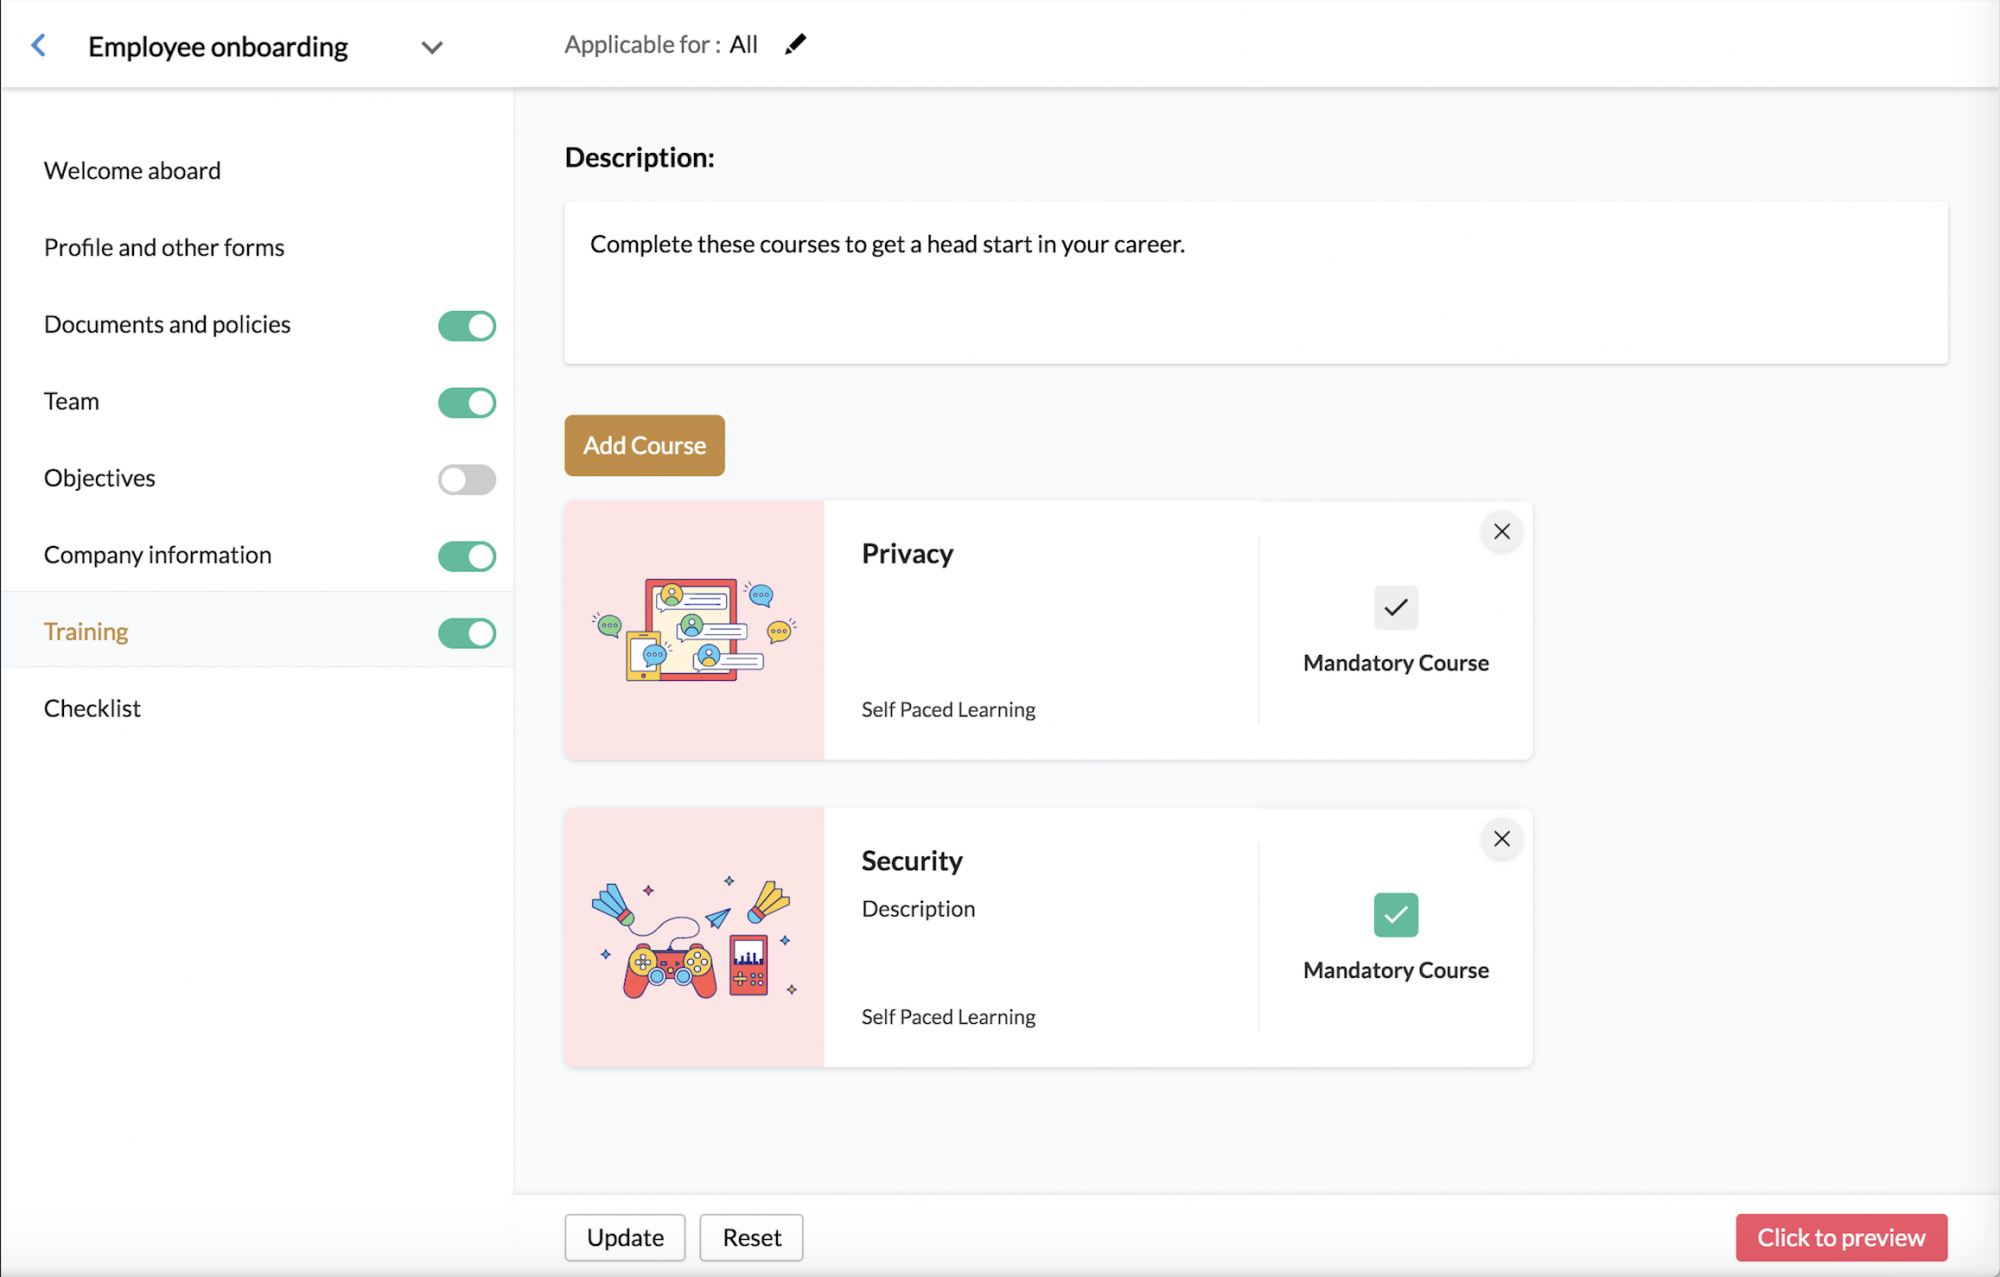
Note: You can preview the employee view of any page by clicking Click to Preview.
Onboarding Process
In this section, we will cover the process of onboarding for candidates and employees along with a view of how the process appears for each, respectively.
Candidates onboarding process
Candidate onboarding is facilitated through a portal. The process of candidate onboarding begins with creating this portal. You need to, therefore, give an appropriate name to this portal.
The portal access URL will typically be in this format: https://people.zoho.com/[portalname]/cp/preonboarding.
This portal is independent of the rest of the product. When a candidate is added and onboarding is triggered, the portal becomes accessible to them.
Once a candidate completes the onboarding process, they can no longer access this portal.
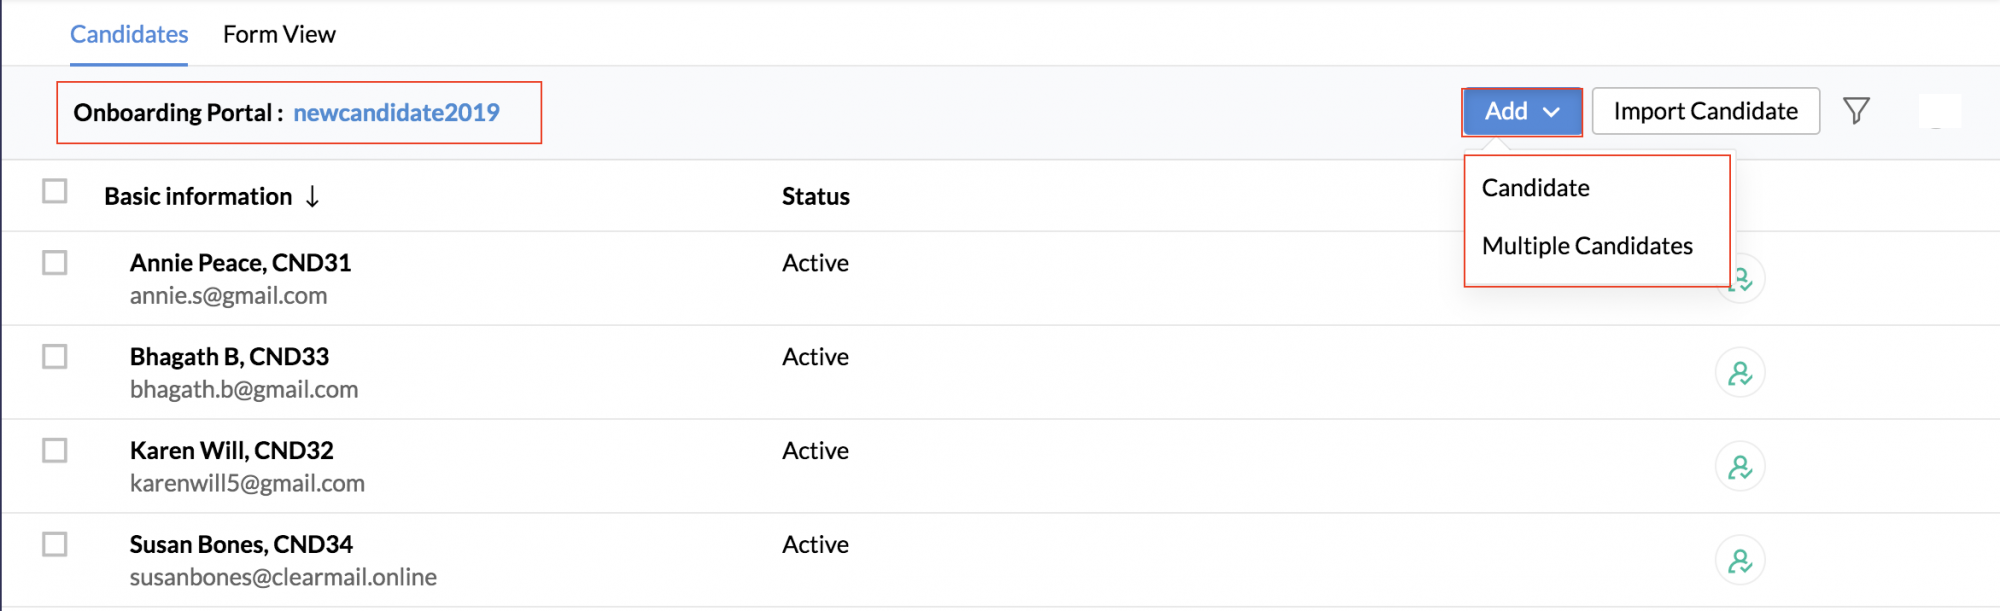
Candidates can also be imported by clicking Import Candidate.
Once a candidate has been added, click Trigger Onboarding to start the process of onboarding.
The candidate’s form will be available under the form view sub-tab. Candidates can be added here as well. Once added, the onboarding process can also be triggered from here by clicking Trigger onboarding.
Candidate’s view of the onboarding process
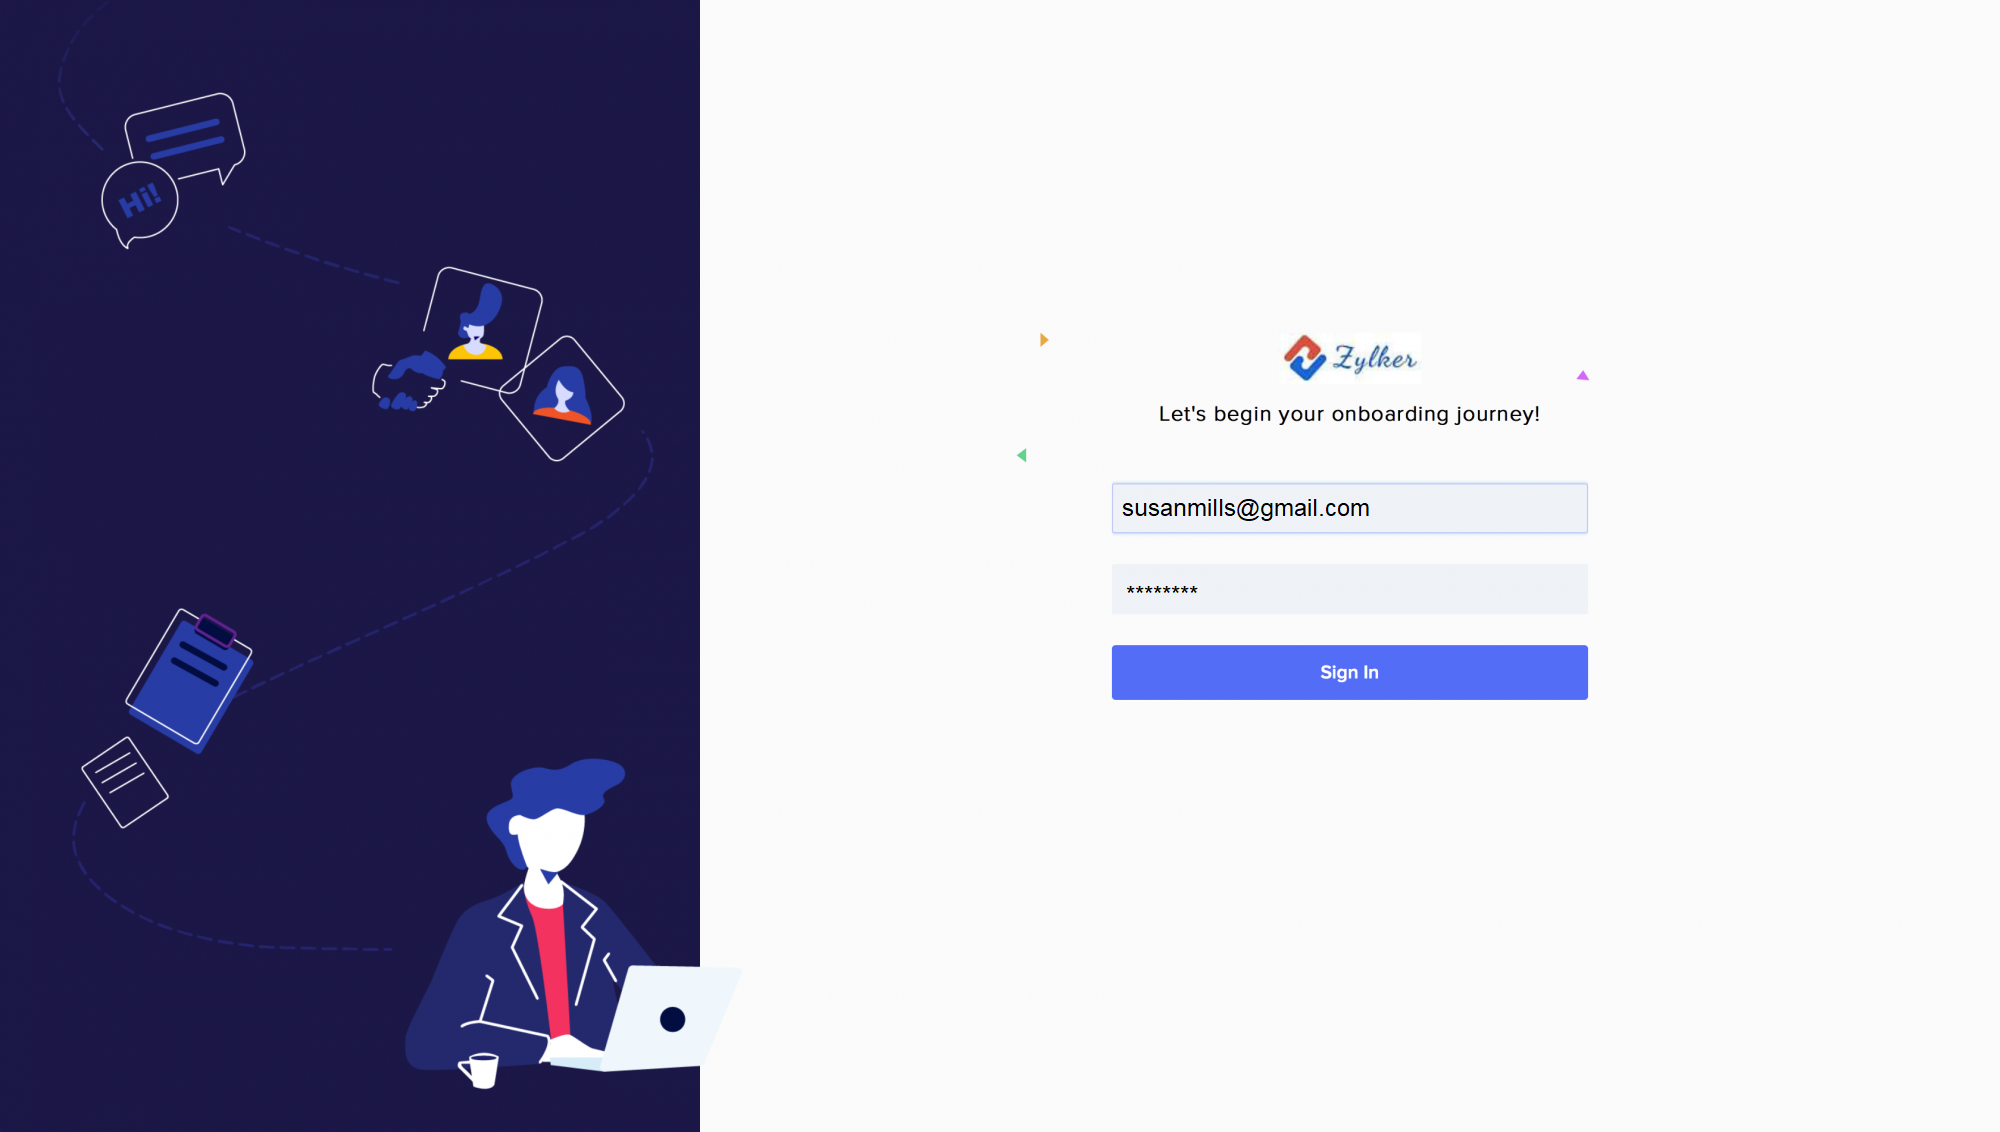
Once Trigger Onboarding is clicked for a candidate, they will receive a mail with a link to set their password.
After the password is set, they will be redirected to begin the onboarding process.
There will also be a secondary link to access the portal in case the candidate logs out during the onboarding process.
Once logged in, they will need to fill in all the information in the tabs. As they complete each step in the onboarding process, they will progress to the next one. They can also go back to any step to alter or delete information if required. You’re all set is the final step. A tick mark will appear beside each completed step.
Once the candidate has ensured that all the steps have been completed, they can click Complete Onboarding.
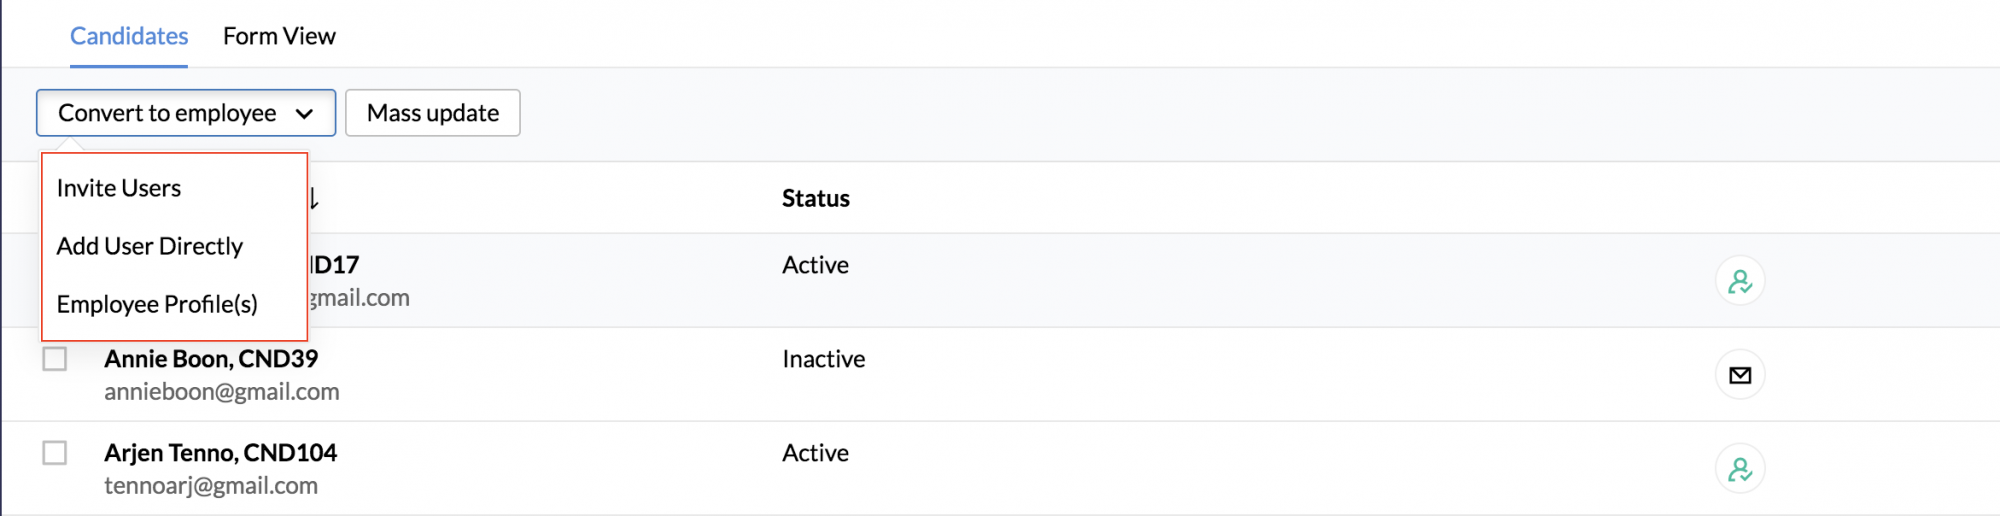
Candidates can also be converted from the form list view page.
Employee onboarding process
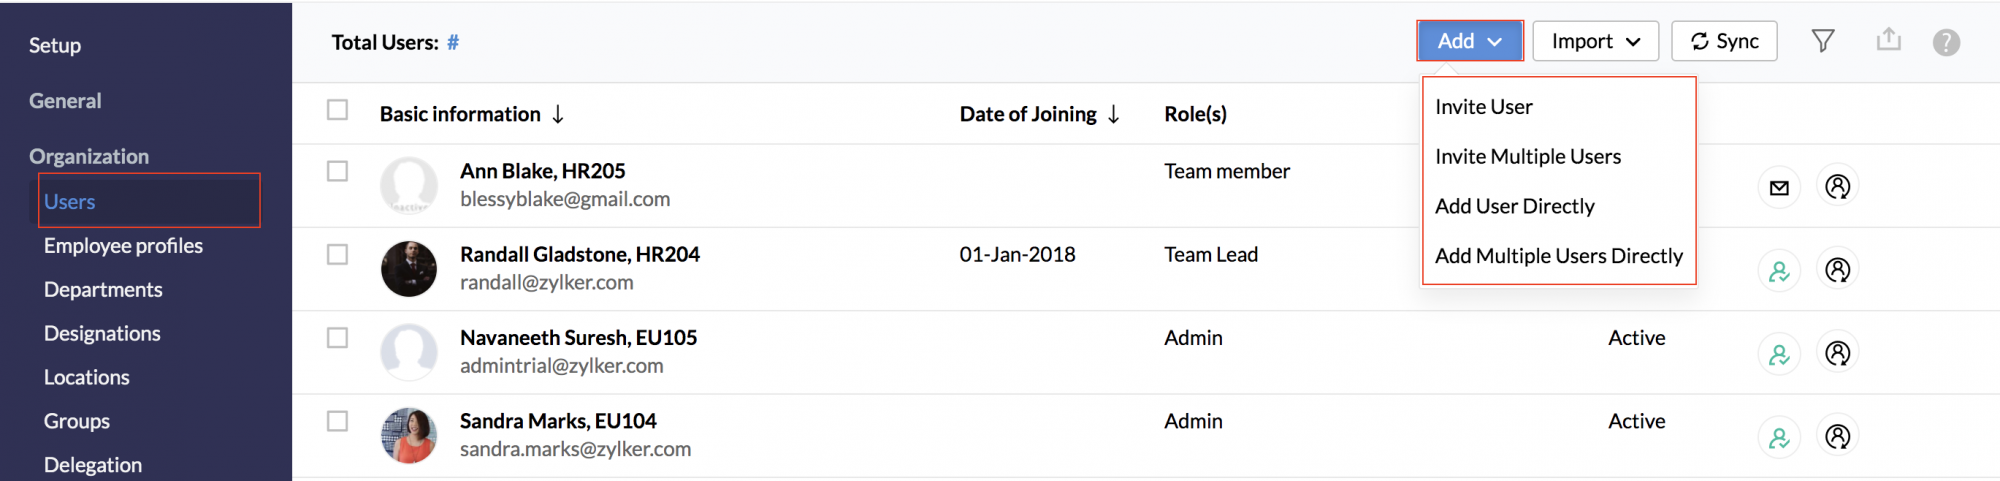
The onboarding process for new users can be initiated at the end of the user addition.
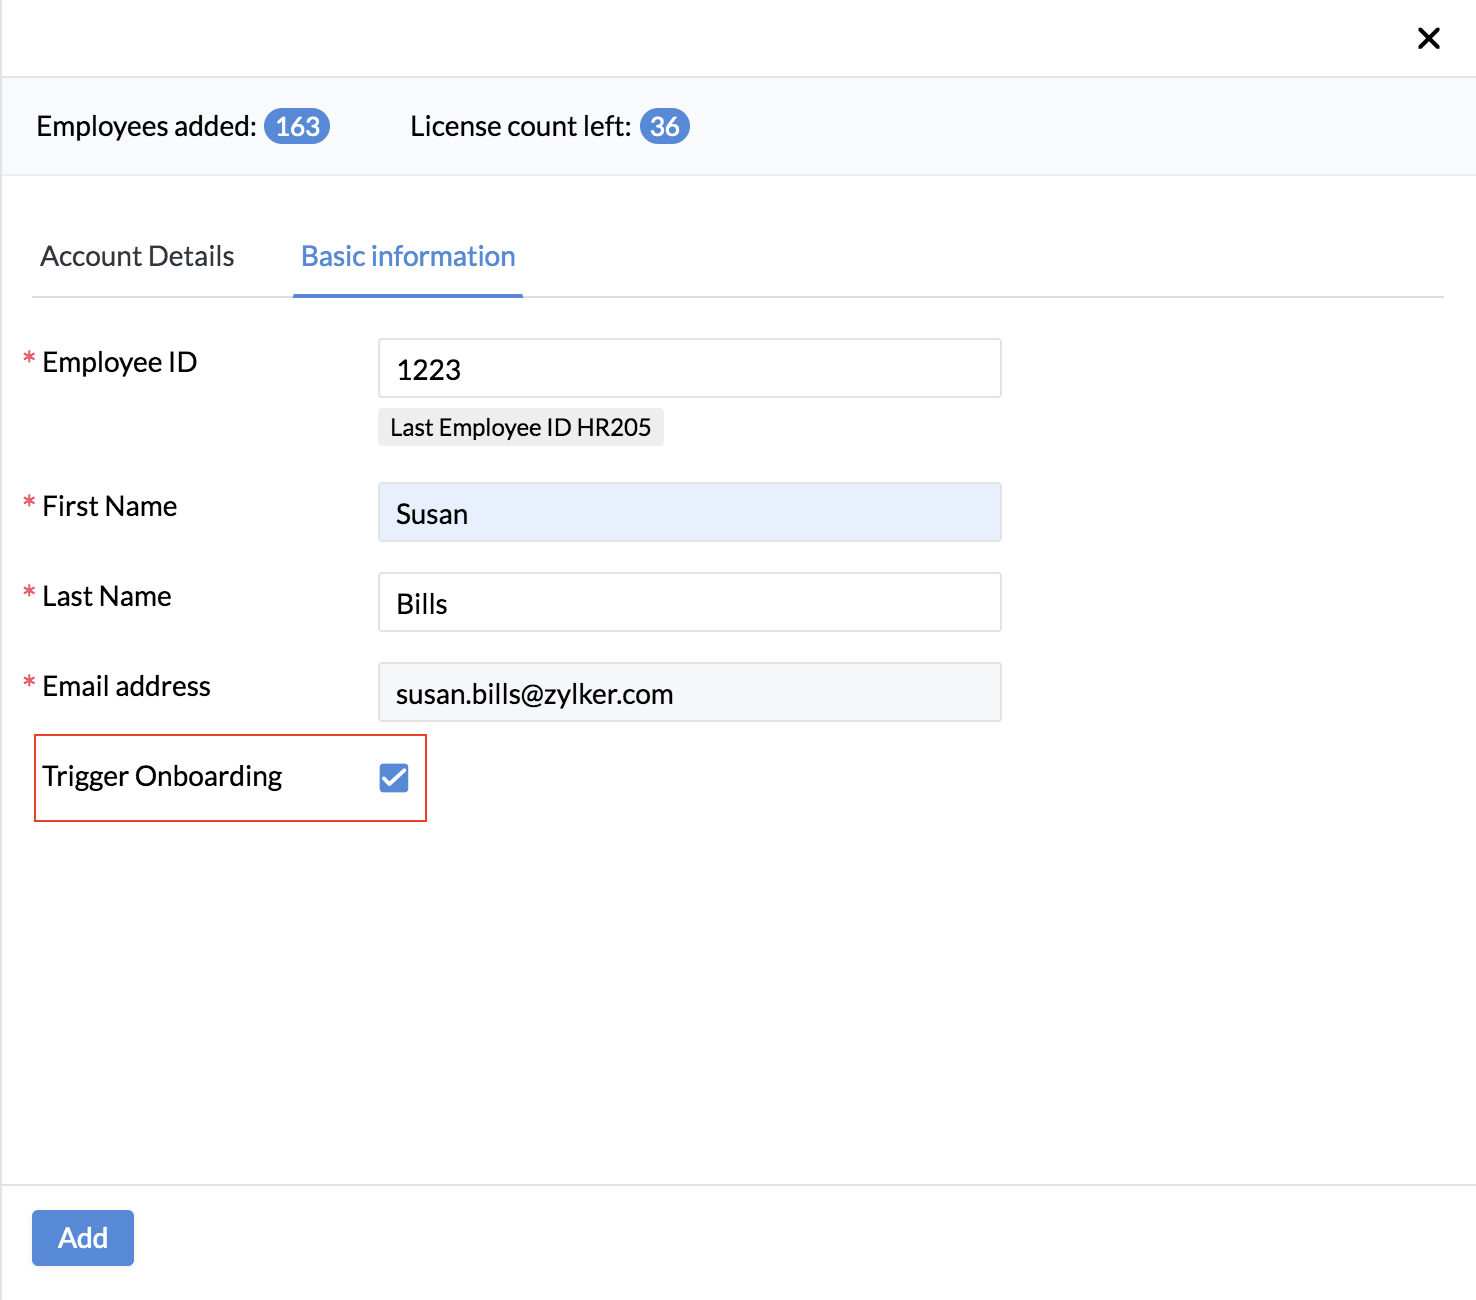

Note: By default, for candidate profiles converted into users, an auto-generated password will be used. The password can be changed later. It is also possible to use a field form the candidate form as a password.
Employee’s view of the onboarding process
As a new employee who has joined the organization, the first process they need to do is complete the onboarding process
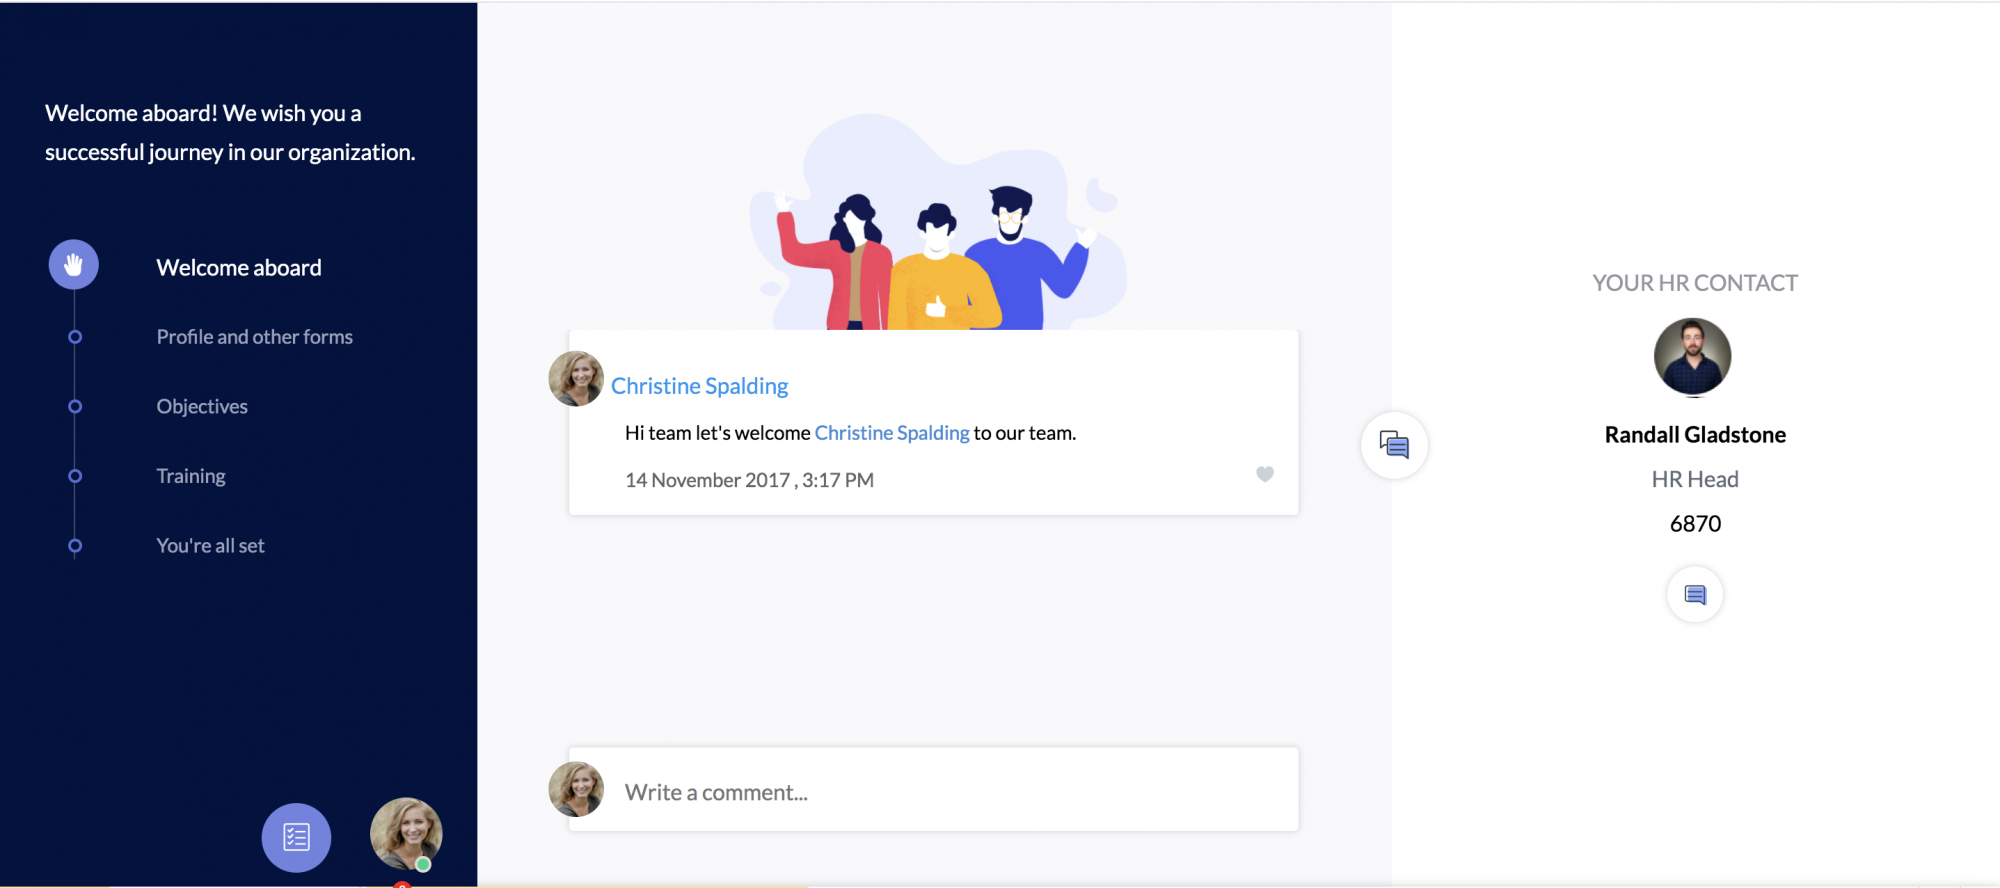
They will need to complete the pages in progress. As they complete each step in the onboarding process, they will progress to the next one. They can also go back to any step to alter or delete information if required.
Important self-paced courses to be completed will be seen in the training tab. The employee can click on each and complete them.
To add or change profile picture, click on the circular avatar, and click Change Image to browse and select a picture from your computer.
You’re all set is the final step. A tick mark will appear beside each completed step. Once they’ve ensured that all the steps have been completed, they can click the Complete Onboarding button and will be redirected to their Zoho People account.
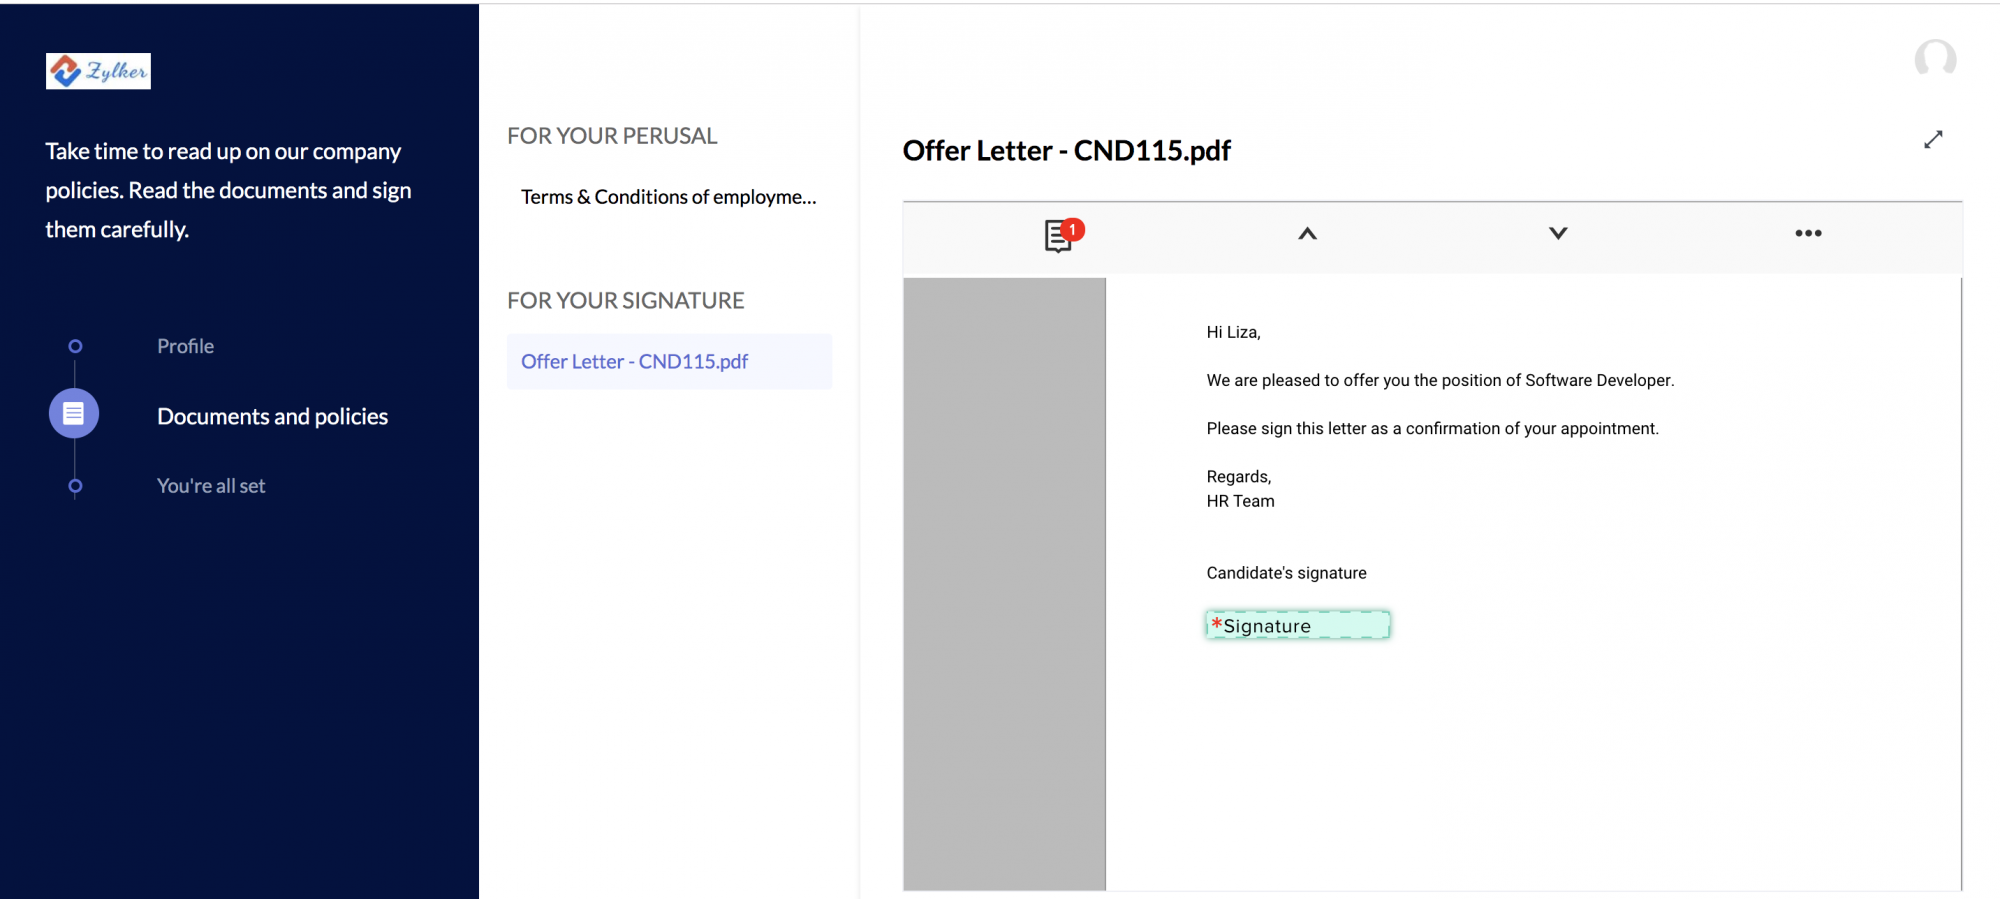
E-Sign for documents
Documents can be electronically signed during candidate onboarding and employee onboarding using Zoho Sign (Zoho Sign – Enterprise plan users), DocuSign, and Adobe Sign. The E-Sign option configured under Settings > Integration will be shown here in the drop-down. If no e-sign is configured, only the accept/decline option will be given.
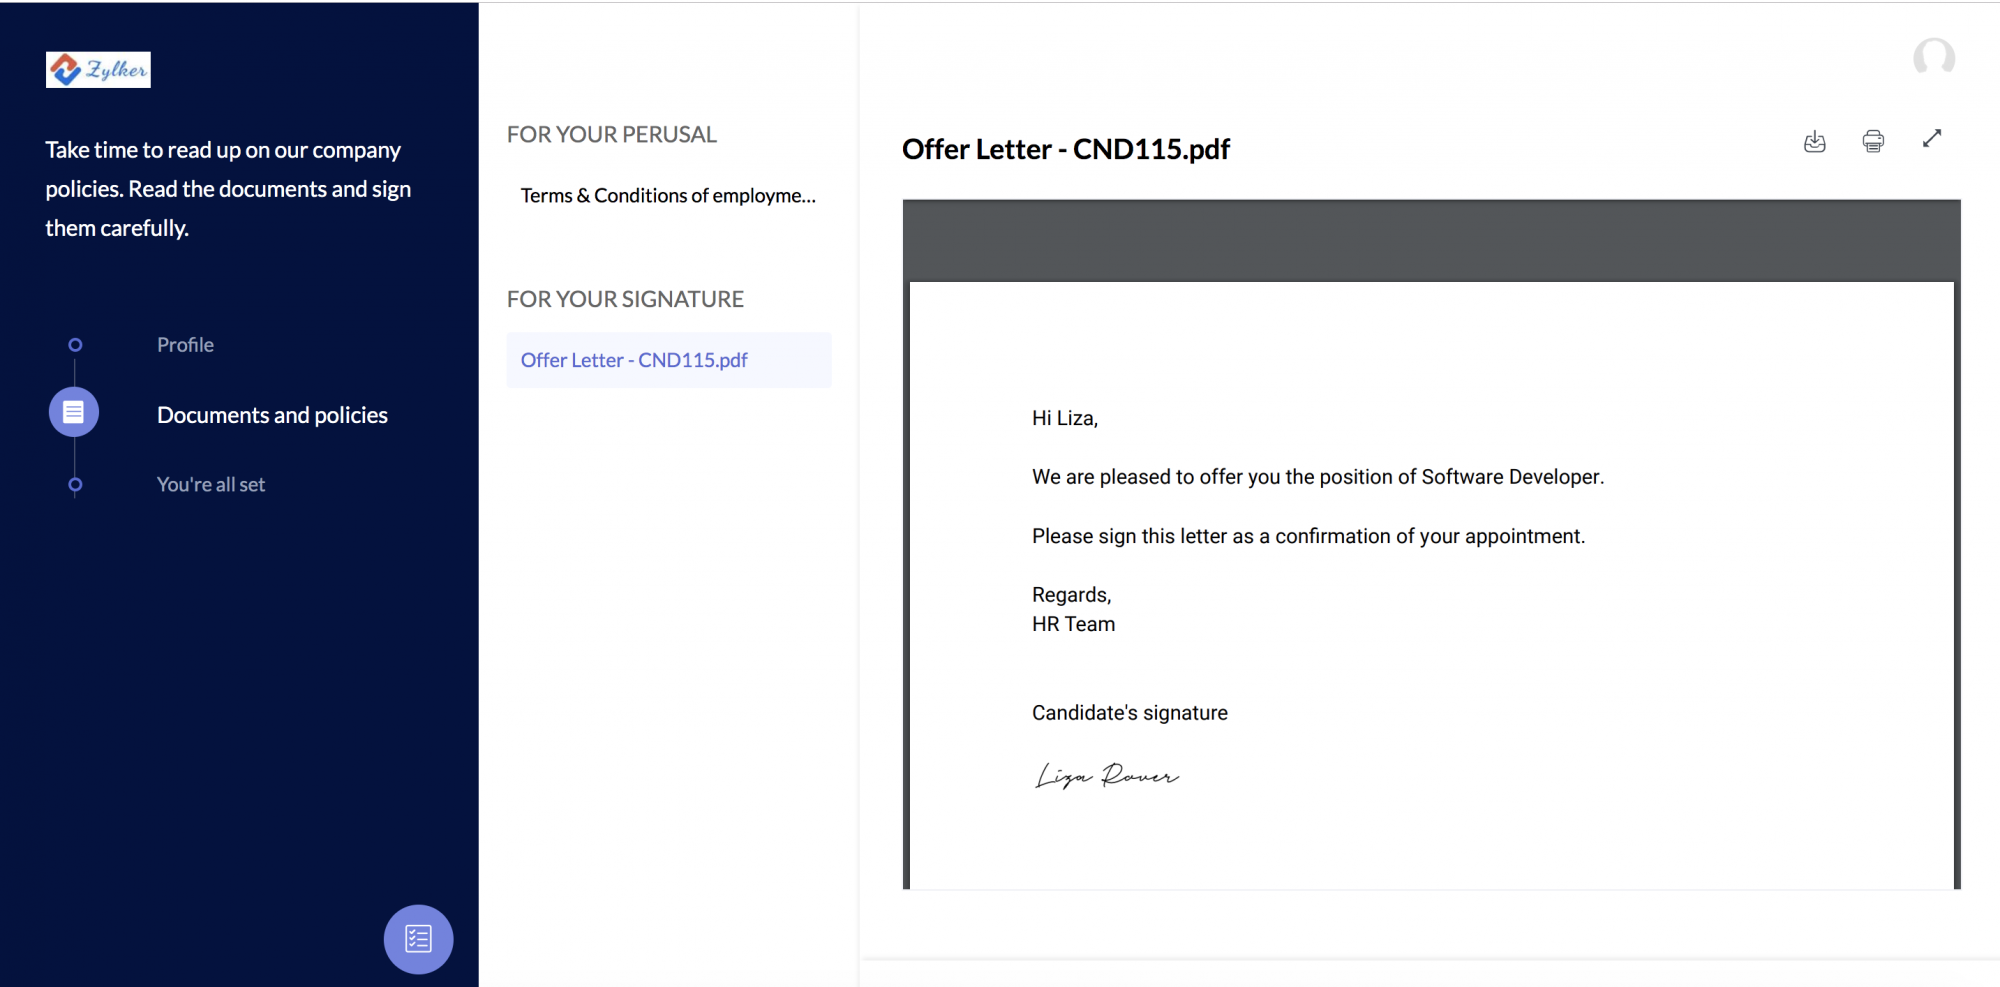
When Zoho Sign has been configured and is selected for accepting the document, ensure the document has a signature field.

The candidate or employee will be able to view and sign the document during the onboarding process.
Onboarding Reports
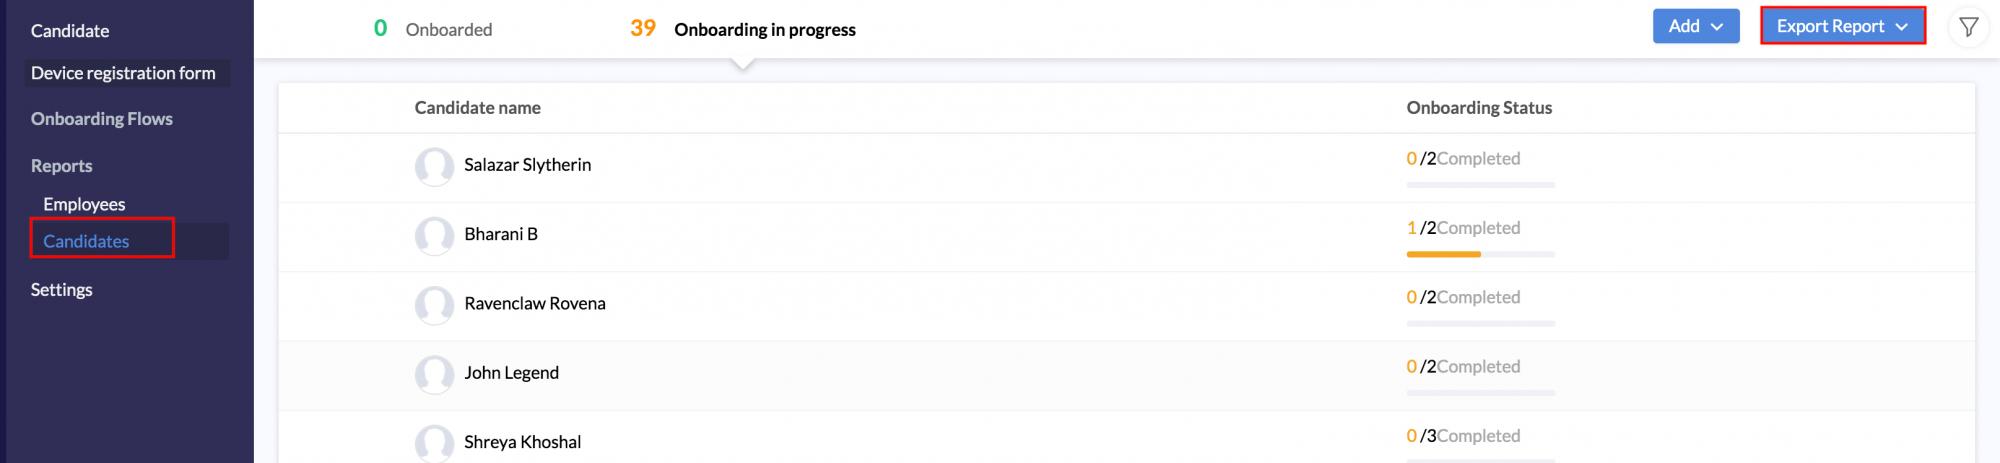
Candidate Reports
To view the candidate reports, go to Reports, then Candidates.
Under reports, you will be able to see the status of the onboarding process.
You can view the breakdown of candidates onboarded and in progress. You can also add candidates to the process at any time, and filter the data that you would like to see by clicking on the filter icon and selecting the criteria to be applied.
To view the progress of a specific candidate, click on the candidate’s status.
Employee Reports
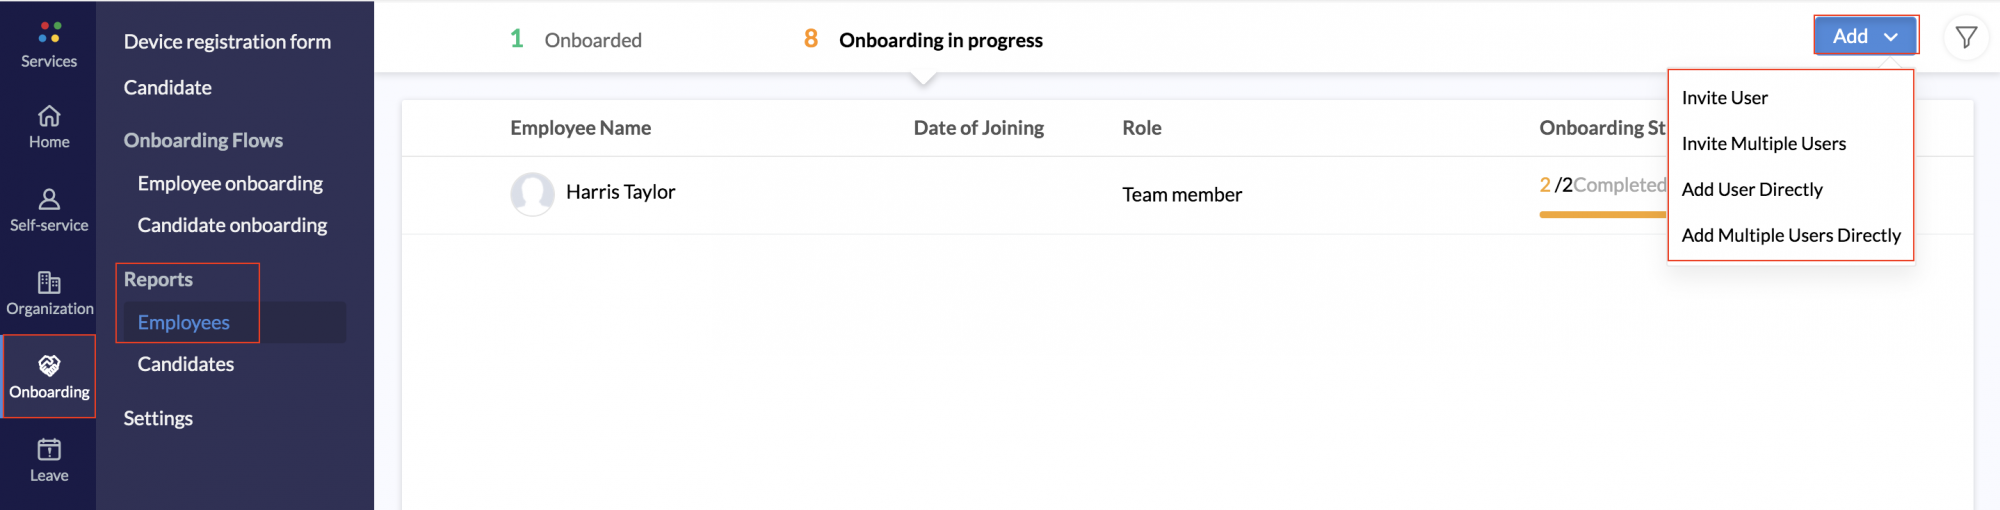
To view reports on employees, go to Reports, and then, Employee.
Under reports, you will be able to see the status of the onboarding process. The break-up of employees onboarded and in progress can be viewed. You can also add employees to the process at any time, and filter the data that you would like to see by clicking on the filter icon and selecting the criteria to be applied.
To view the progress of a specific employee, click on the employee’s status.

The employee and candidate reports can be exported in CSV, XLS and XLSX formats by clicking Export Report on the right top corner.

Onboarding Settings
Use the onboarding settings to customize the way you want to conduct the employee and candidate onboarding process in your organization.
To configure the settings related to onboarding, go to Onboarding > Settings.
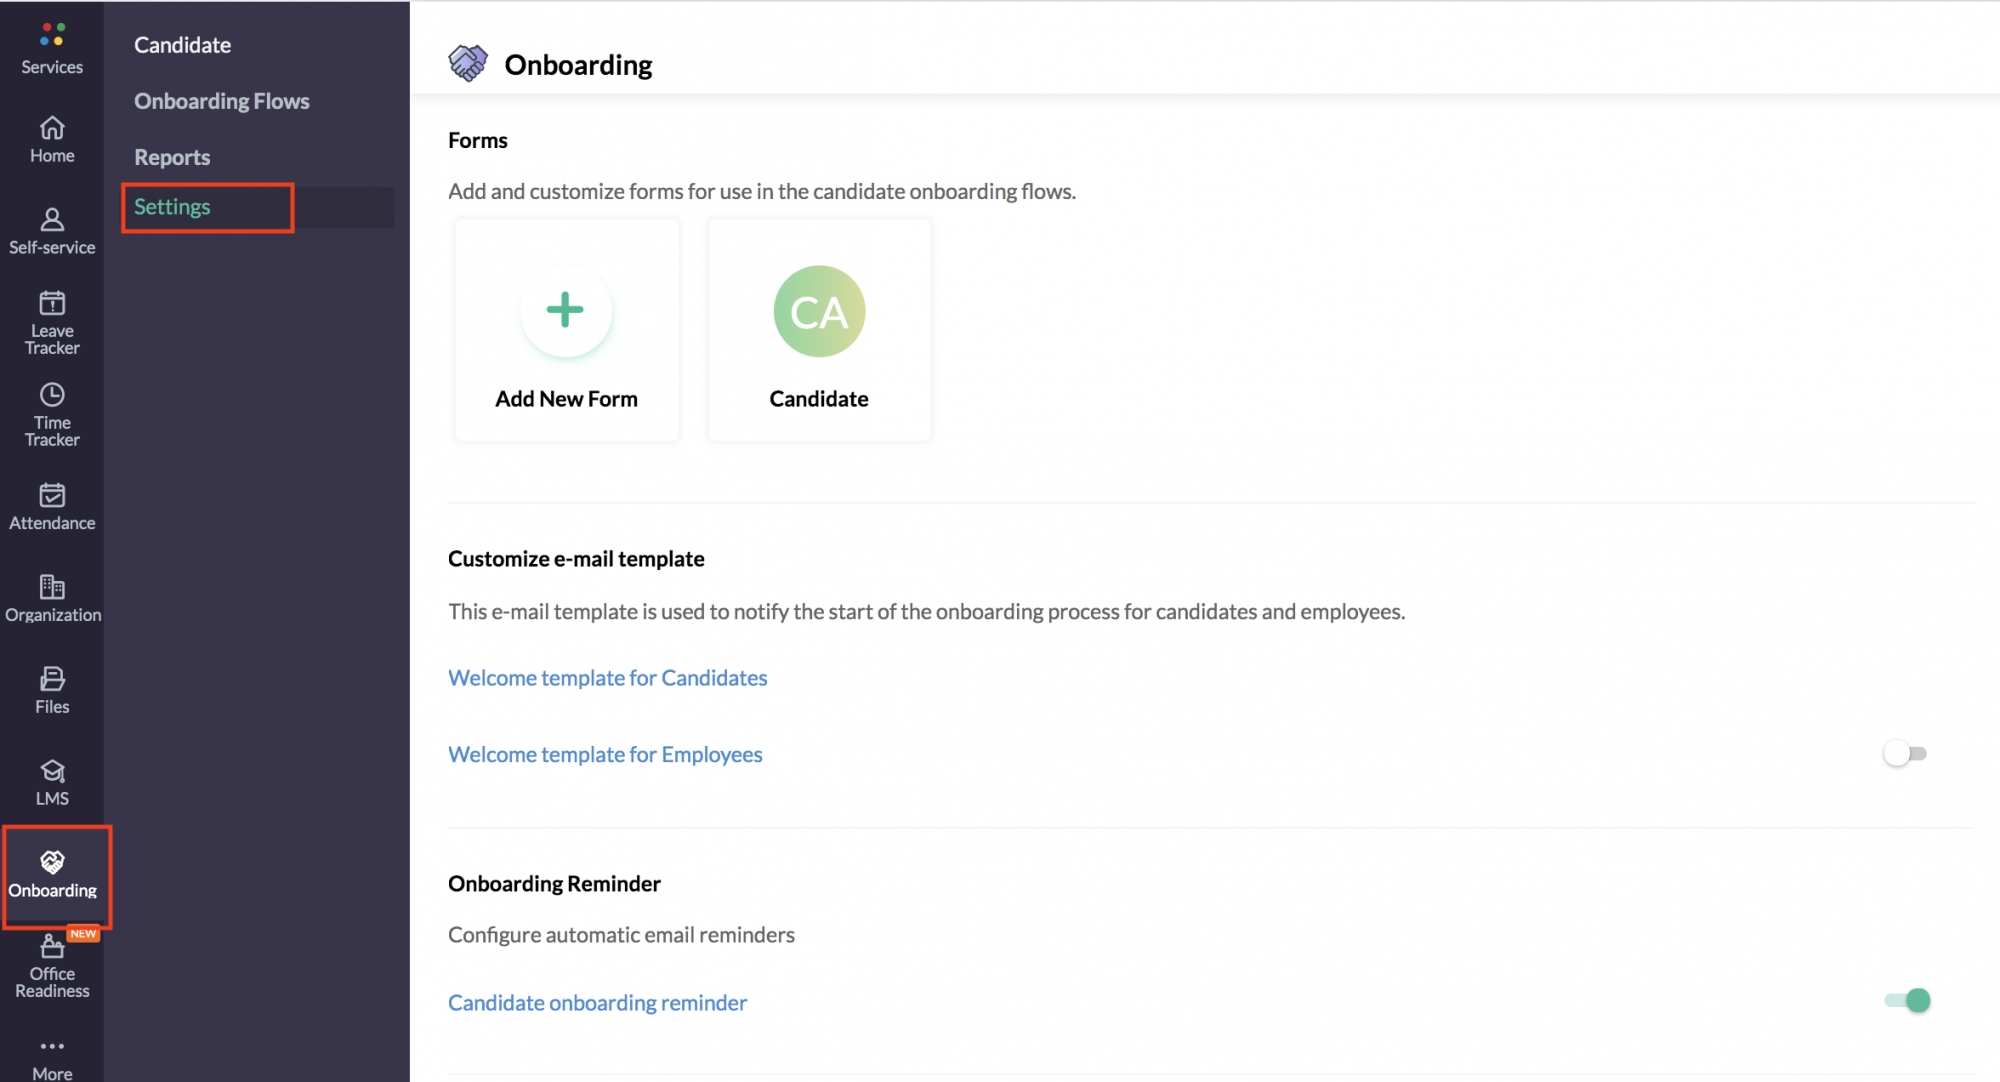
Forms
Forms are used to collect important information from the candidate during the onboarding process.
These forms can be embedded as part of the onboarding flow. You can add these forms in this section. Added forms will be listed here. To add a new form, click + Add New Form.
Customize email templates
You can customize email templates for welcoming candidates and employees.
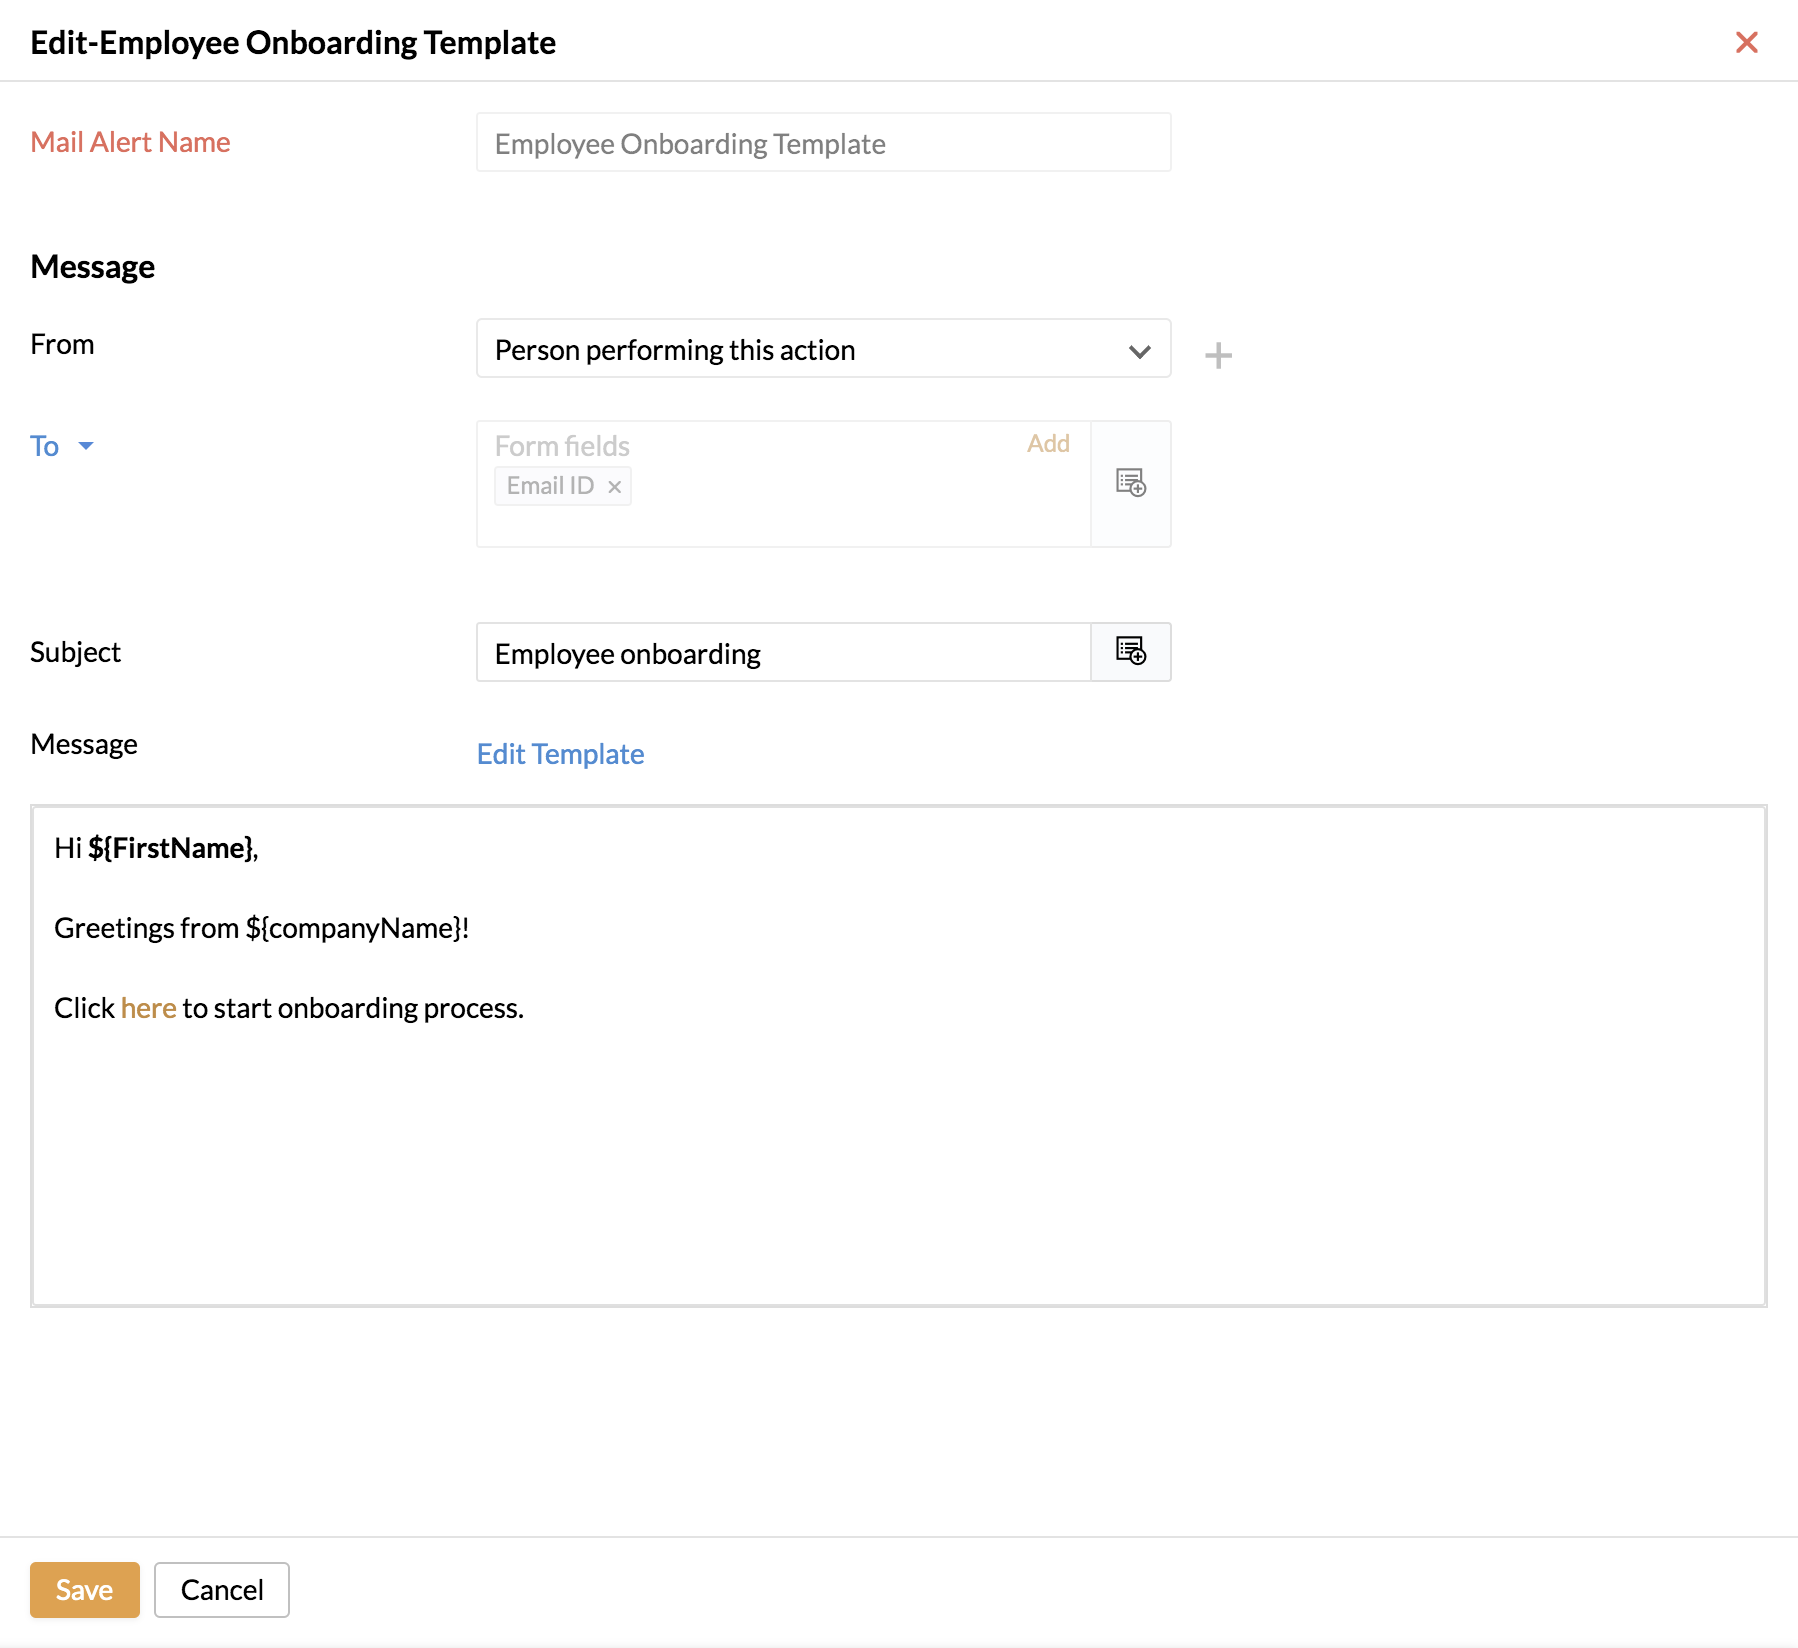
Similarly, to customize the employee email template, click Welcome template for Employees.
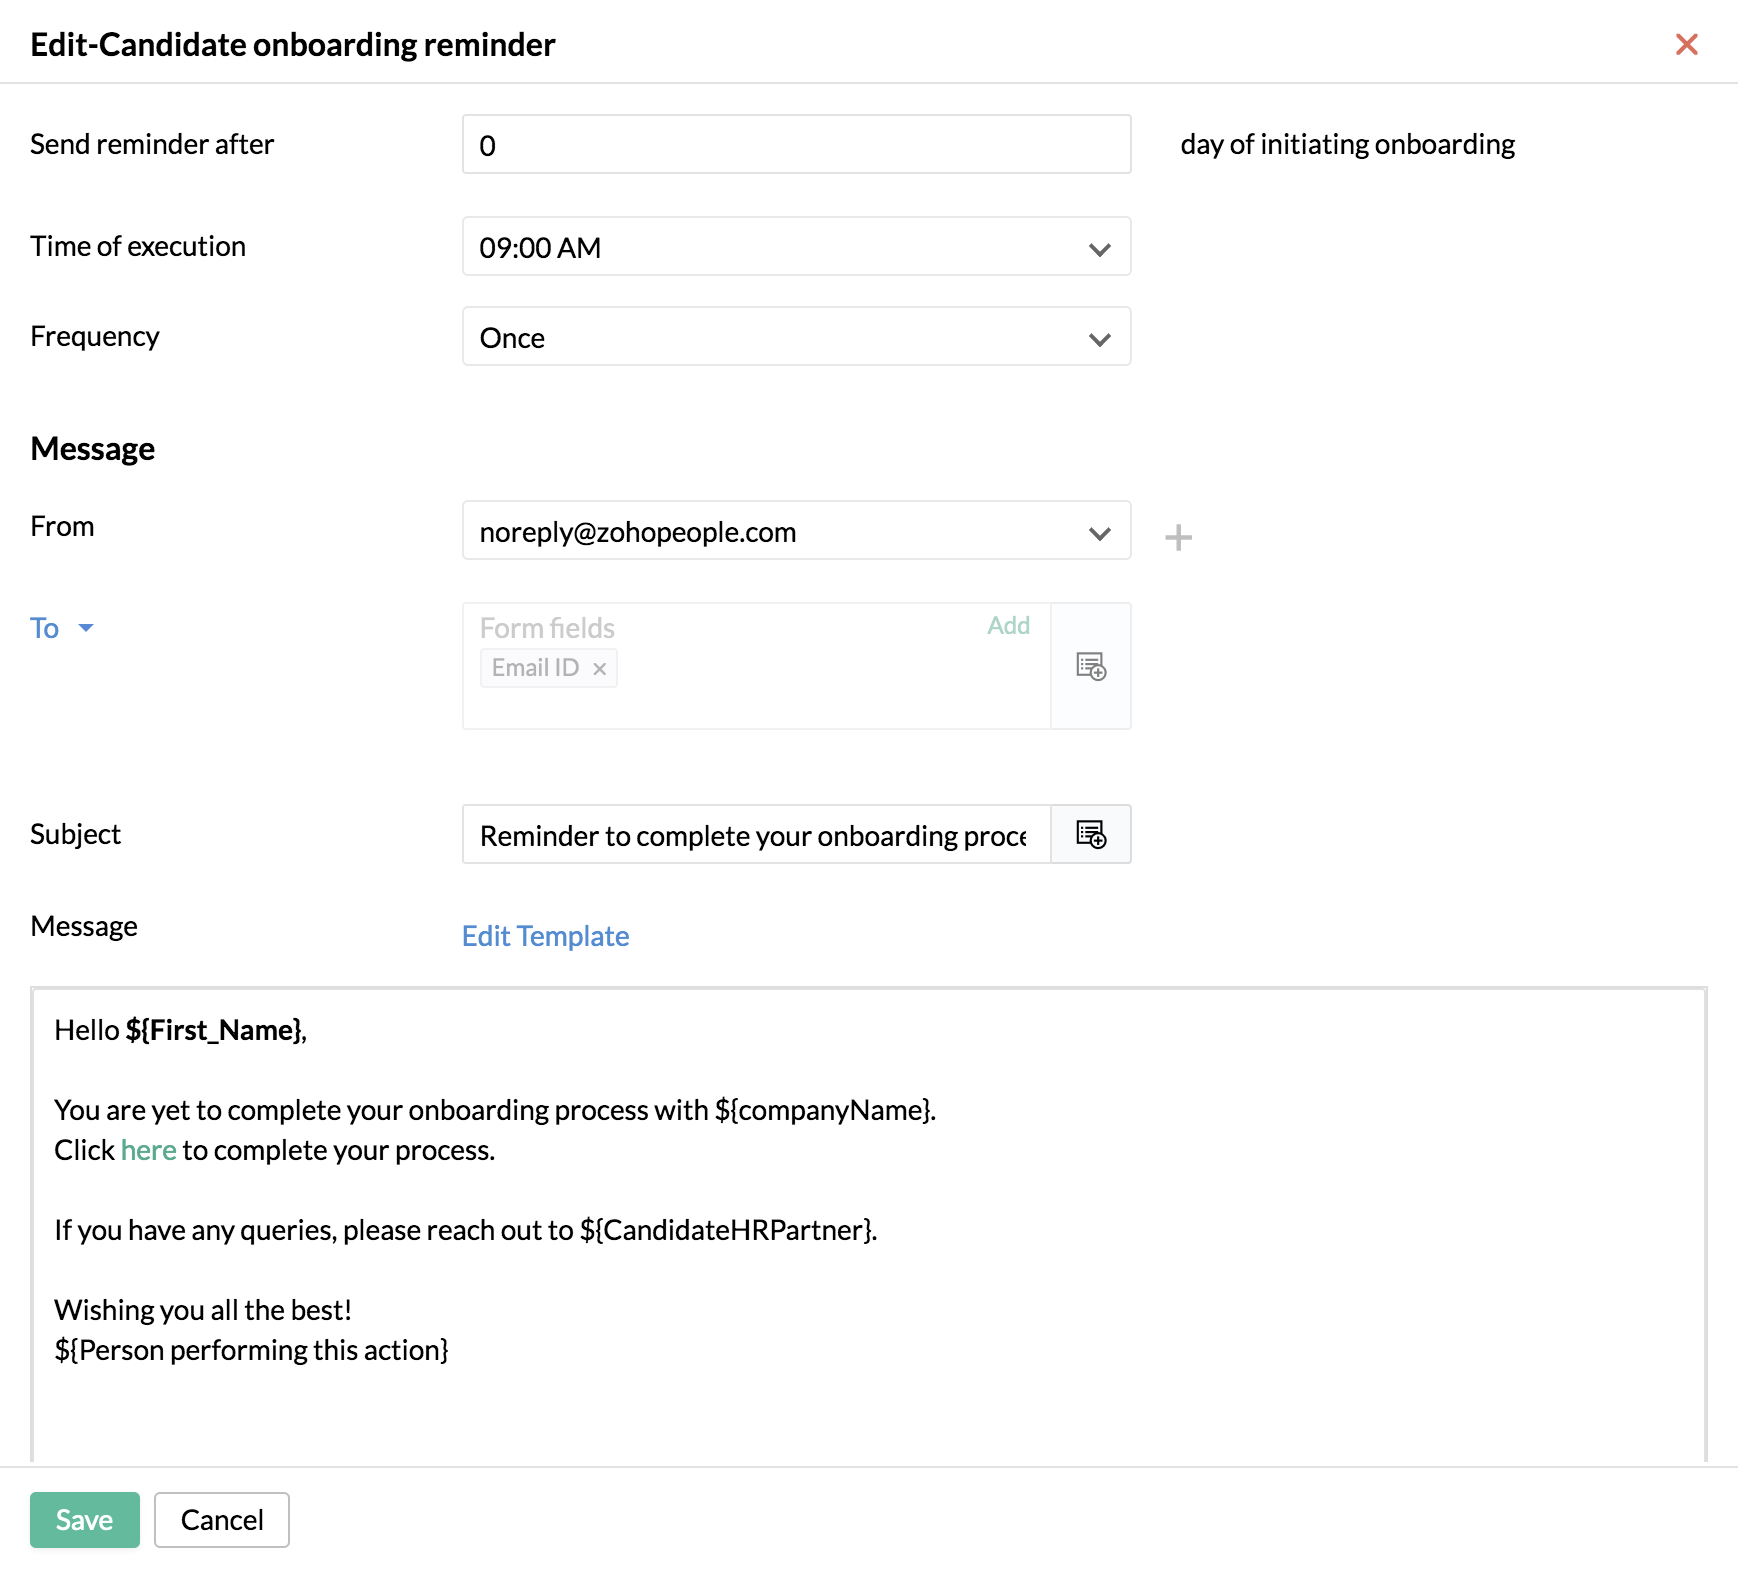
Onboarding Reminder
Using this setting, you can automate reminders to be sent to candidates to complete their onboarding process.
Enable the setting and click on the Candidate onboarding reminder to customize the email template.
Trigger Employee onboarding automatically
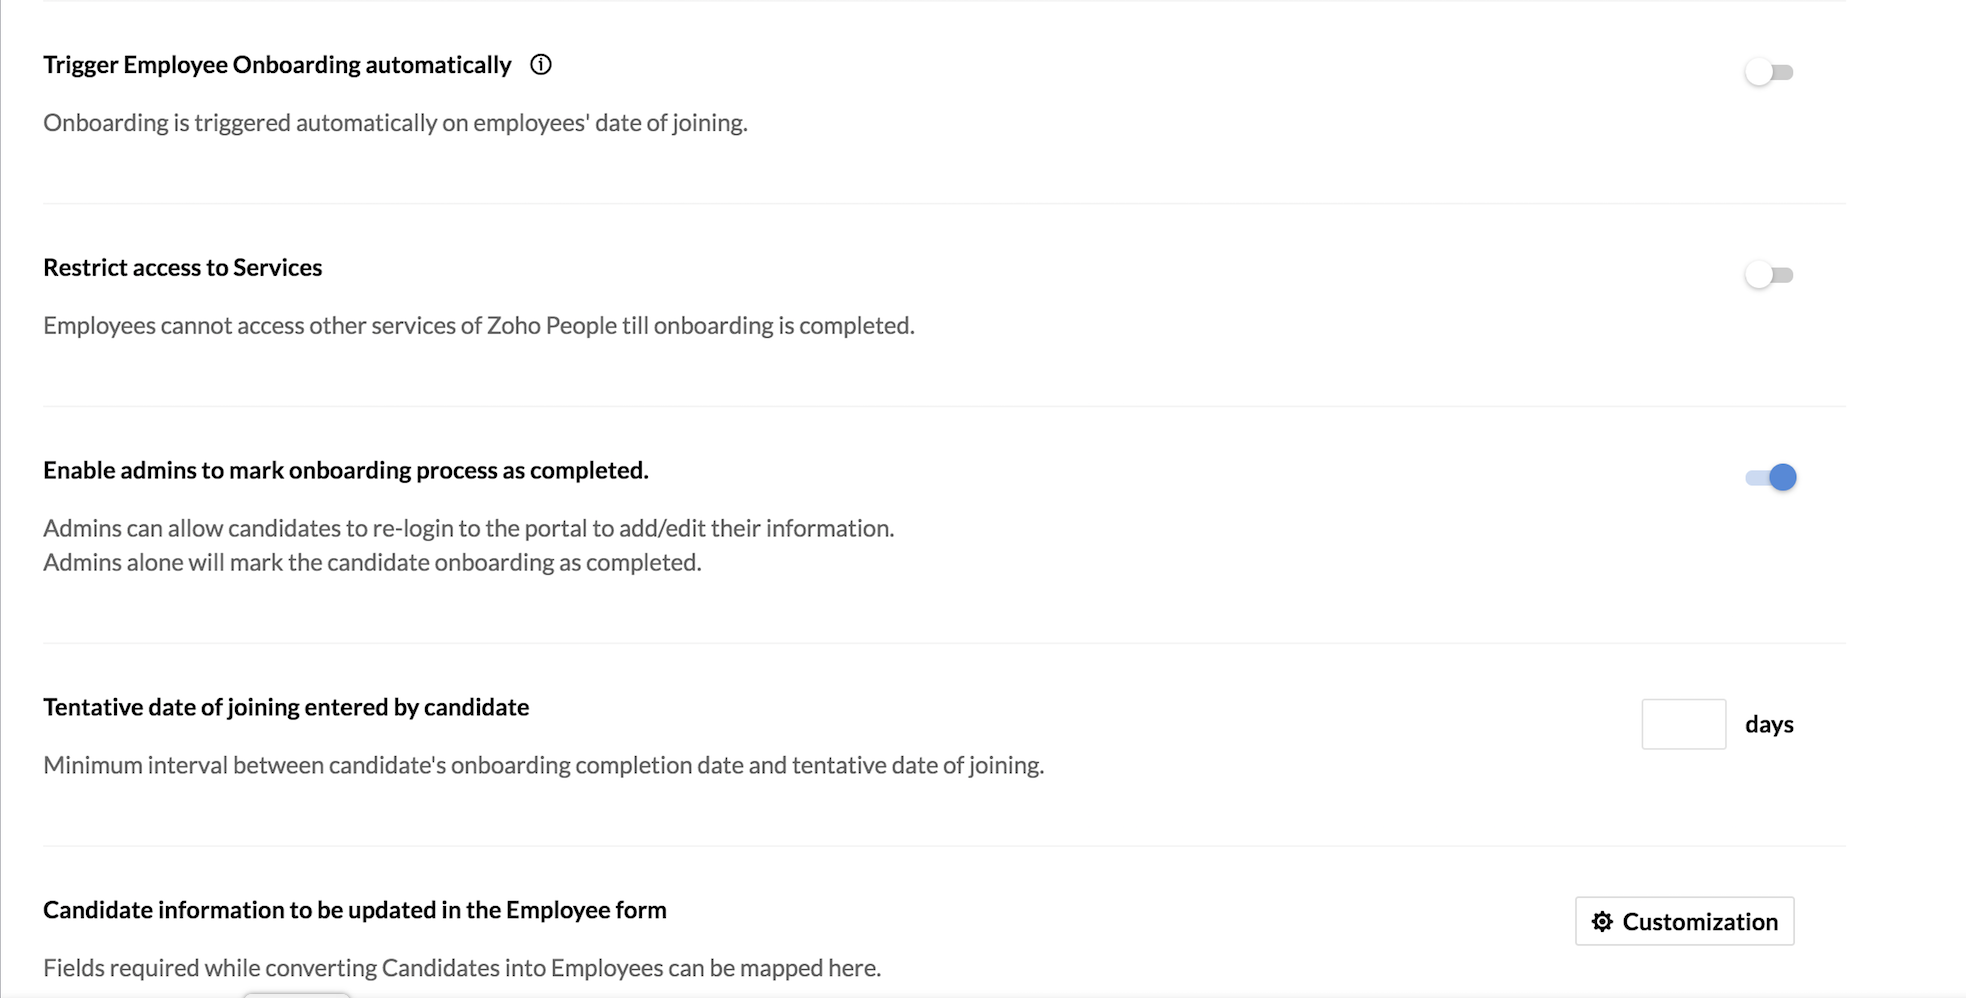
Using this option, you can trigger employee onboarding automatically on the employee’s date of joining. Onboarding will be triggered for employees who have joined on or after the date on which this option is enabled. Once this is enabled, you need not trigger onboarding for employees manually.
Restrict access to Services
Once this option is enabled, employees will only be able to access other services in their Zoho People account after they have completed the onboarding process. Employees will not be able to skip the onboarding process and access their accounts.
Enable admins to mark onboarding process as completed
Once a candidate has completed the onboarding process at their end,they will not able to access the portal again. However, when an admin checks they may find some information unfilled. In such cases, you can use this option where the candidate can re-login to the portal to make changes and admin alone will have the option to mark the onboarding process as completed. The status of completion can be viewed under Candidate Reports as Completed by Candidate and Reopened by Admin.
Tentative date of joining entered by candidate
This option can be used to enter a minimum interval, in days, between the date of onboarding completion and the tentative date of joining entered by the candidate. Let’s say 10 days is entered by an organization. This means that on the time of their onboarding completion, the candidate must have entered a date that is minimum 10 days from the current date. If the entered date does not match, the candidate will be prompted to alter the date.
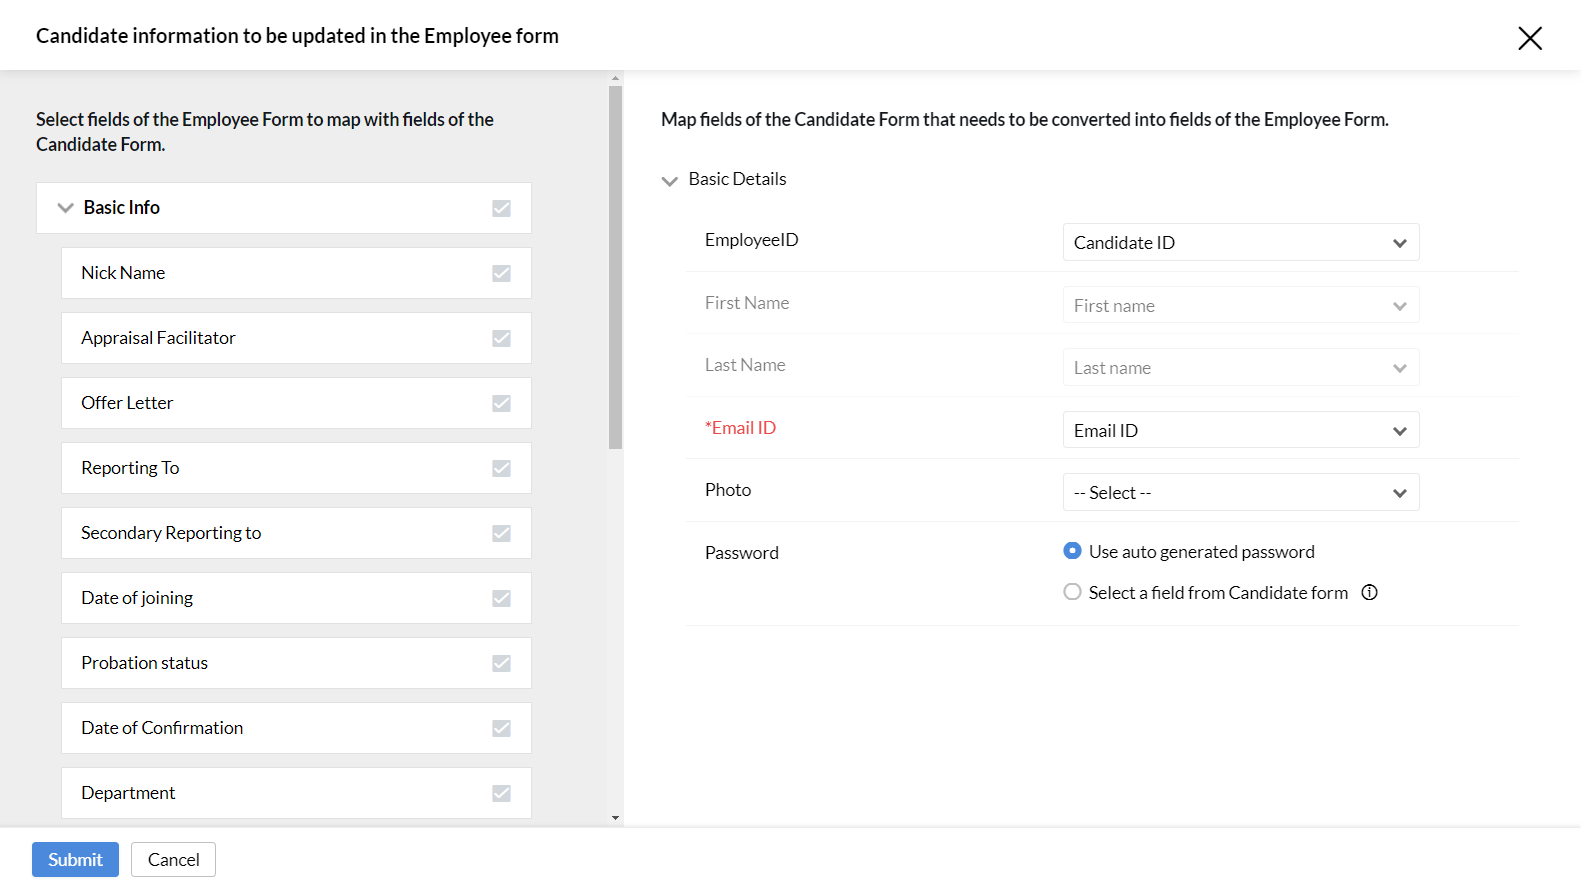
Candidate information to be updated in the employee form
In this section, you can select the information from your candidate form that you want to update in the employee form when they are converted from a candidate to an employee. To achieve this, select the fields in your employee form, map the corresponding fields in the candidate form, and save this configuration. This way, when you convert a candidate to an employee, all the details in the selected fields will be updated automatically in the employee form.